A quick market survey on RAM expansions for the C64
The Commodore 64 features a whopping 64kB of RAM, hence its name. Most of this is actually usable at least when programming in assembler. While this used to be quite a lot when compared to competitors in the market, even back in the day there were different external RAM extensions. Some of the popular “freezer” cartridges like later versions of the Action Replay or the Super Snapshot feature some additional RAM of their own.
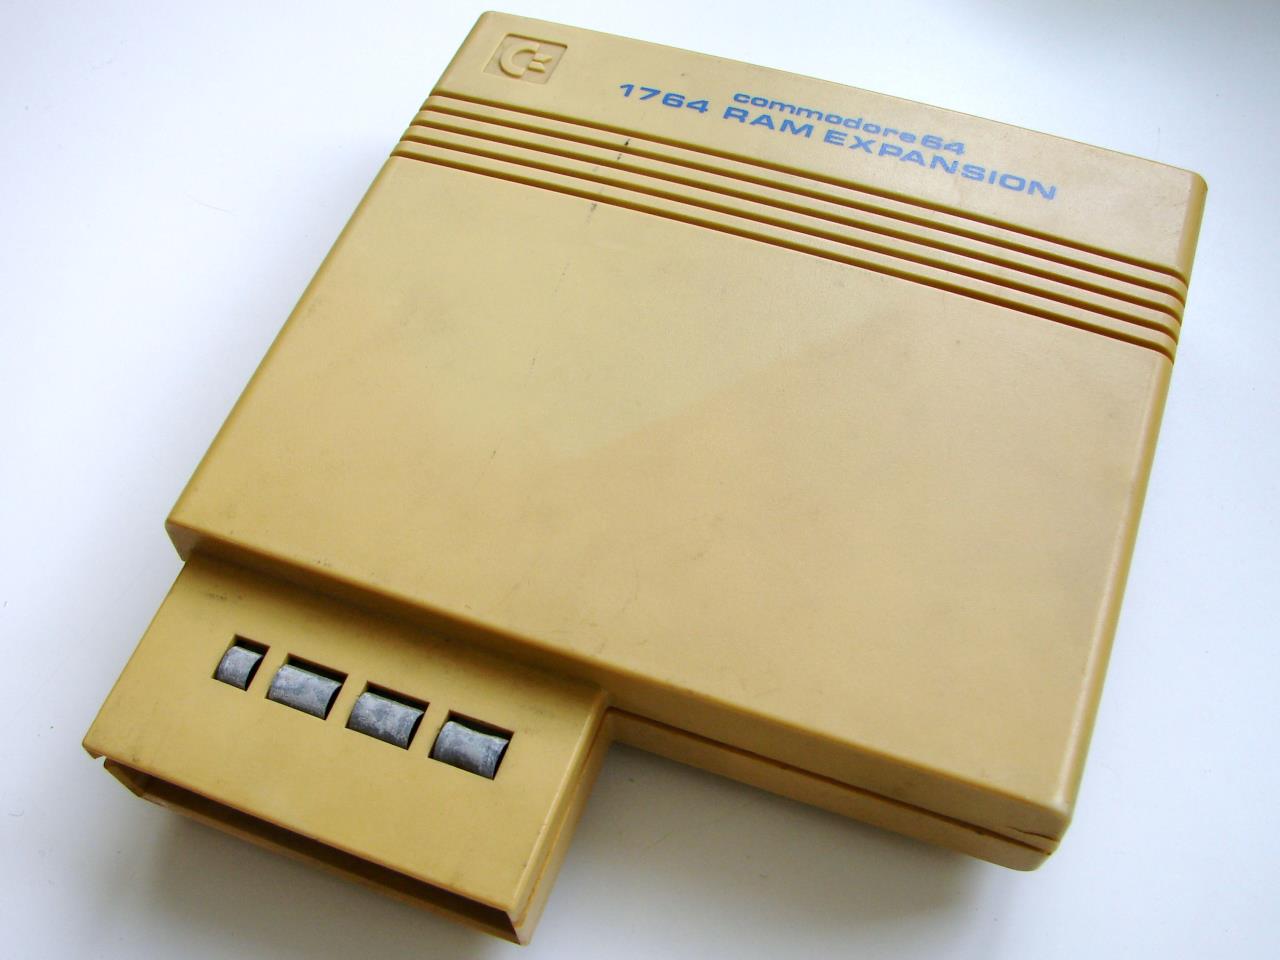
Commodore 1764 REU. (photo by T. Conté)
Commodore started selling their RAM Expansion Units (REU) in 1985 when the C128 came out. The REU was actually quite sophisticated, with its own controller — the MOS8726, REC — that provides fast memory-transfer by DMA.
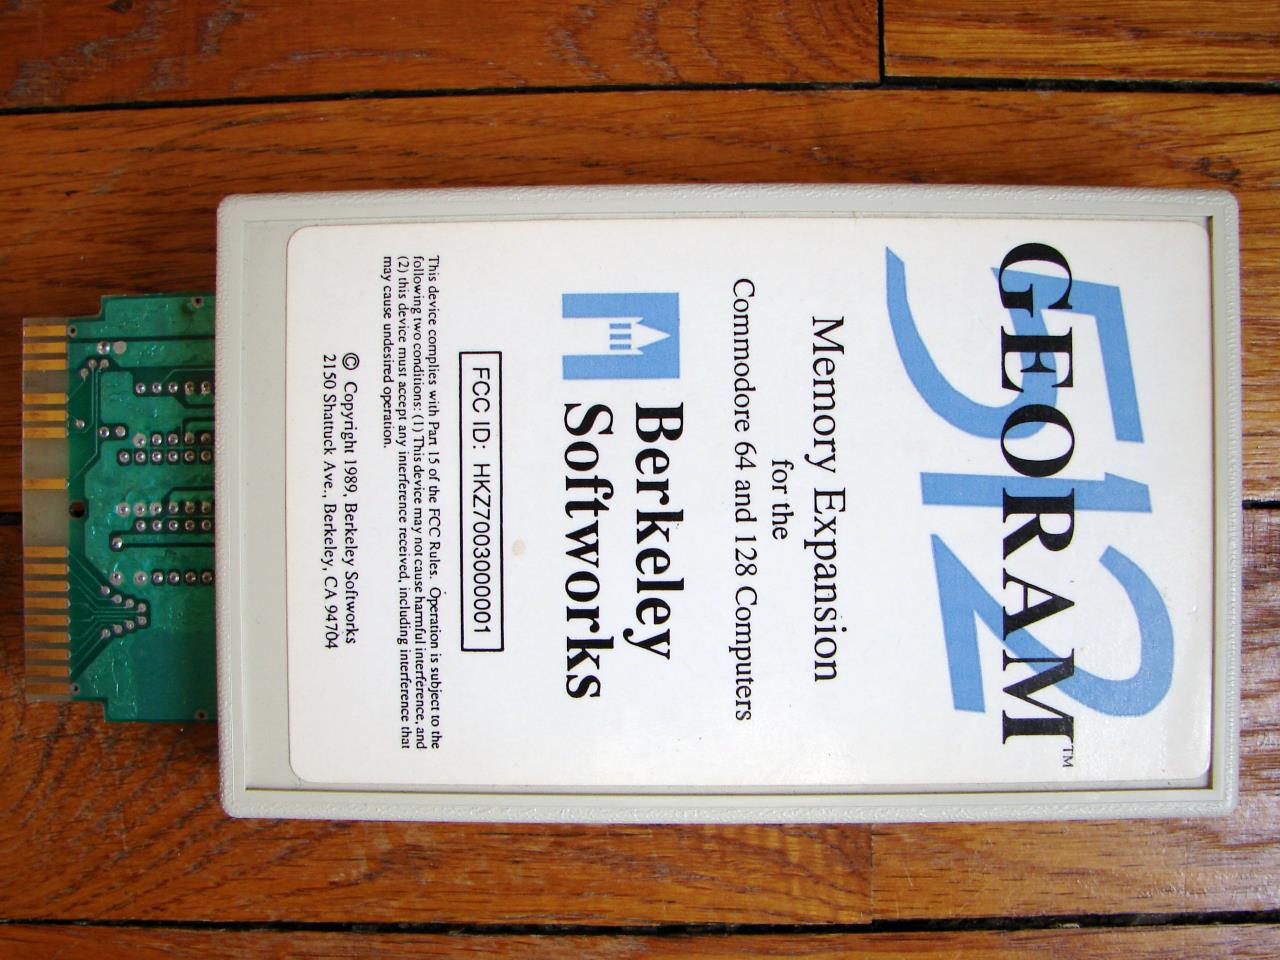
The GeoRAM cartridge. (photo by T. Conté)
When Commodore cancelled the REU the company behind the GEOS operating system developed their own memory expansion cartridge for use with their system, called the GeoRAM. The GeoRAM lacks a real memory controller, it simply allows pages of 256 bytes each to be mapped into the I/O area of the C64.
Let’s build one
Today, there are different replicas of the GeoRAM available. Since I don’t own any of the RAM extensions mentions so far I decided to build one of those “modern” versions for myself. I settled for the NeoRAM developed by Nicolas Welte aka. x1541 in 2006, introduced on Forum64. The NeoRAM is very compatible to the GeoRAM but it allows for a maximum of 2MB of RAM and it is battery buffered with a single CR2032 cell preserving the contents of the memory for months.

The original NeoRAM carridge.
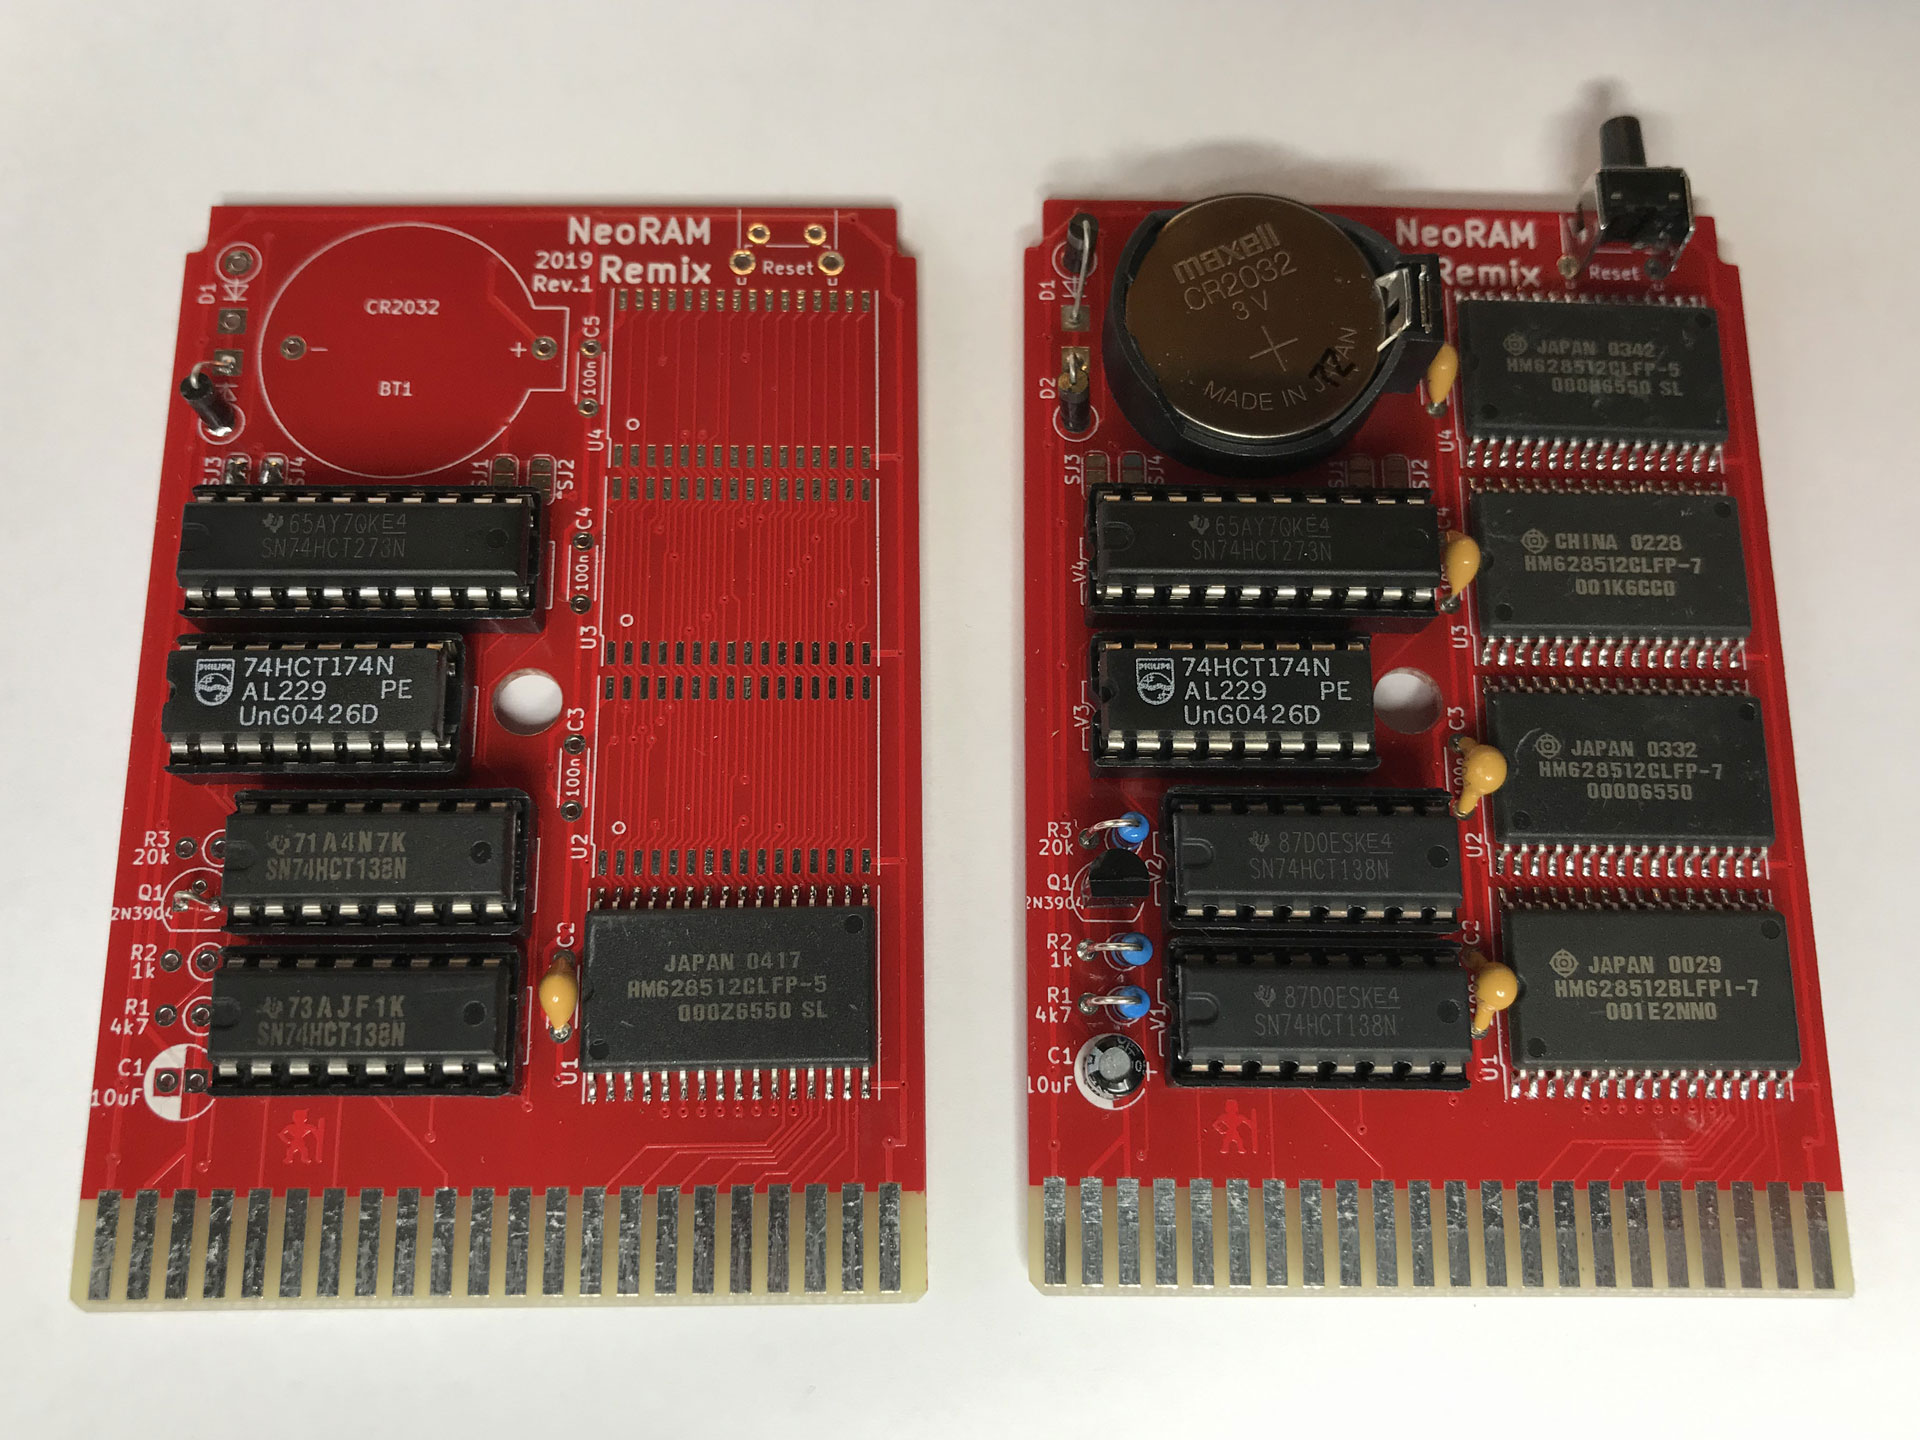
Building myself a NeoRAM cartridge turned out to be more complicated than I thought. I had already placed orders for the components when I realized that it wouldn’t be quite as easy to get hold of the PCB. The layout files for the final version are not publicly available and when I asked around, nobody had a PCB for sale. So, based on earlier versions of the NeoRAM schematics that I found on Forum64 and other places I began to replicate the project using KiCAD. But then I got lucky after all: Bobbel — who is also running the Restore-Store for us — agreed to sell one of the PCBs he had left over and I was able to assemble an original NeoRAM when all components had finally arrived!
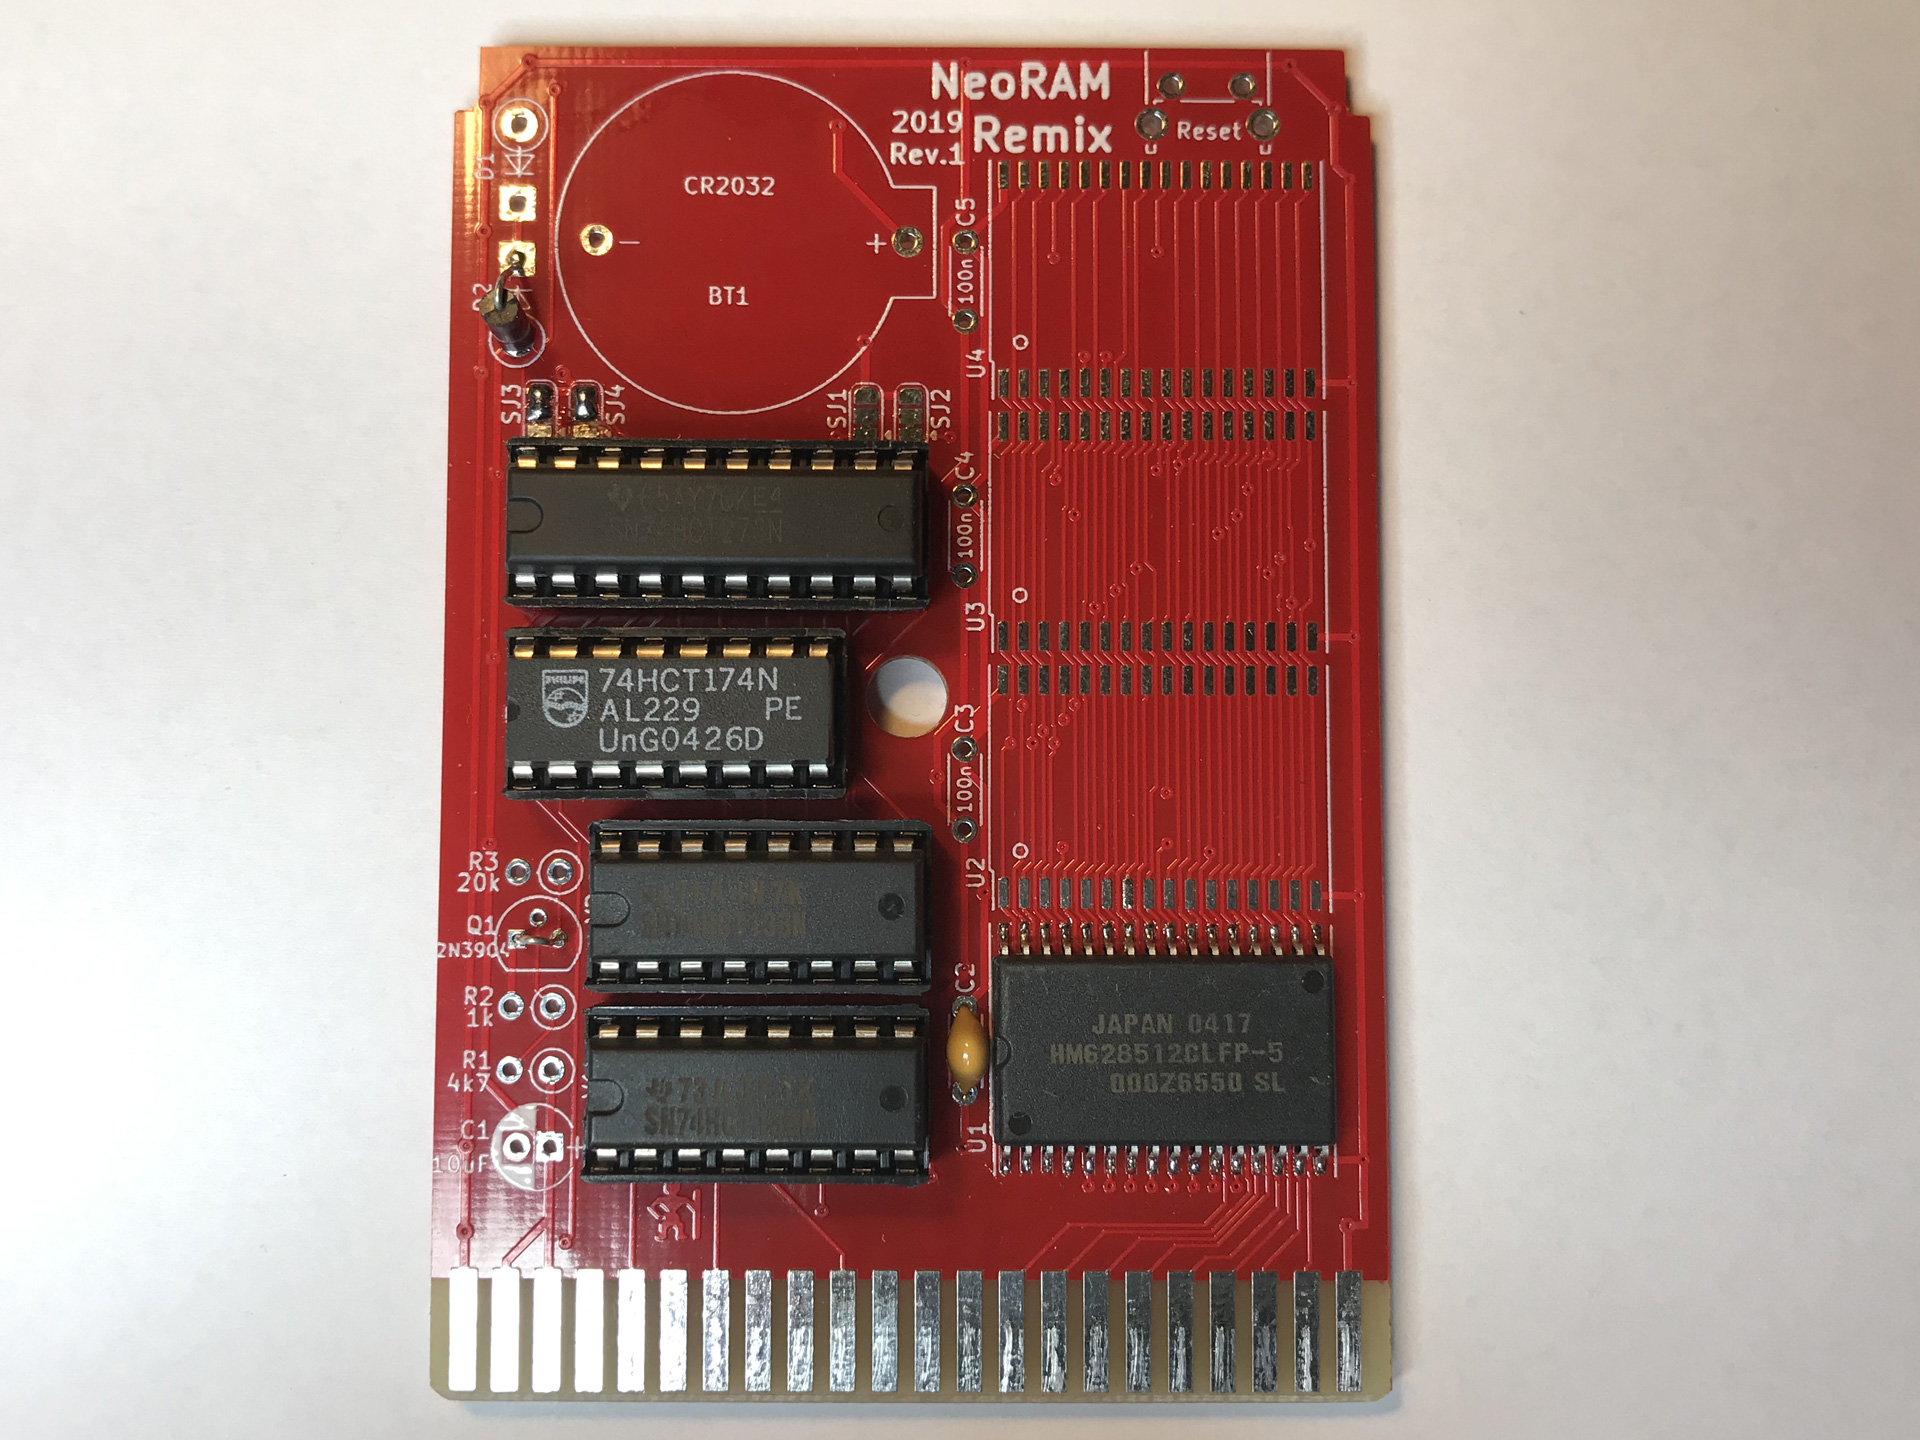
The NeoRAM Remix 2019 Edition
Since I usually order more components than I actually require I had some of them left over now. Also, the half finished KiCAD project nagged at me. So I decided to complete it after all and build my own version of the cartridge that I named the “NeoRAM Remix”.

The NeoRAM Remix fully assembled.
The NeoRAM Remix is fully compatible to the original with only a few modifications:
- The mounting hole at the center is slightly larger and moved by a few mm to fit standard cases more easily available.
- I used a different battery holder that seems to be cheaper and easier to source today.
- The PCB provides for an optional reset button because that’s always a good idea.
As with the original NeoRAM, there are a few options when assembling the board. It can be fitted with 512kB of RAM like the GeoRAM or extended to either 1MB or 2MB of memory. The solder jumpers SJ3 and SJ4 are configured to decode 2MB of RAM by default and should be reconfigured if the cartridge will permanently be equipped with less.
| RAM | SJ3 | SJ4 |
|---|---|---|
| 512kB | 2-3 | 2-3 |
| 1MB | 1-2 | 2-3 |
| 2MB | 1-2 | 1-2 |
Minimal NeoRAM with 512kB of RAM and the battery circuit bridged.
If battery buffering is not required the battery holder can be omitted of course, as can some of the circuitry. In this case the /CS signal for the RAM chips must be bridged to ground. I might actually add another solder jumper for this in the next revision. Such a minimal version of the NeoRAM should then be very much equivalent to the original GeoRAM only much smaller and cheaper.
Minimal and full version of the NeoRAM Remix.
For a fully equipped NeoRAM Remix however, the following components are required.
| Amount | Ref | Description | Source |
|---|---|---|---|
| 1 | C1 | tantalum capacitor 10uF | eBay (China) |
| 4 | C2-C5 | ceramic capacitor 100nF | eBay (China) |
| 2 | D1,D2 | 1N5817 Schottky diode | eBay (China) |
| 1 | BT1 | CR2032 battery holder | eBay (China) |
| 1 | R1 | resistor 4.7kΩ | eBay (China) |
| 1 | R2 | resistor 1kΩ | “ |
| 1 | R3 | resistor 20kΩ | “ |
| 1 | Q1 | transistor 2N3904 | eBay (China) |
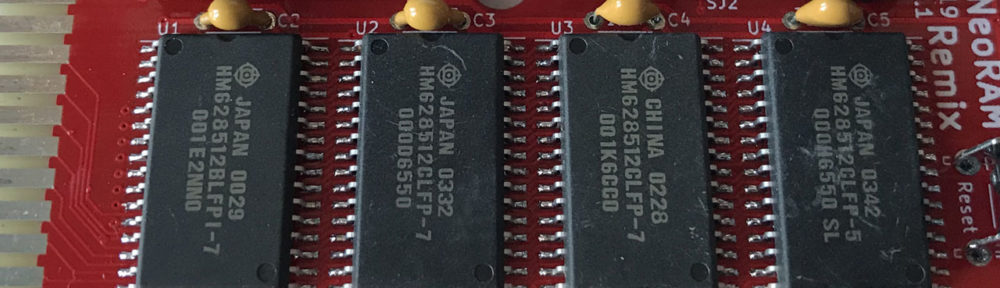
| 4 | U1-U4 | 512K x8 CMOS static RAM, e.g. K6X4008C1F or HM628512 | eBay (China) | AliExpress |
| 2 | V1-V2 | 74HCT138 decoder | |
| 1 | V3 | 74HCT174 flip-flop | |
| 1 | V4 | 74HCT273 flip-flop | |
| 3 | V1-V3 | DIP socket 16pin | eBay (China) |
| 1 | V4 | DIP socket 20pin | eBay (China) |
| 1 | Reset | tactile push button 6x6x9mm, right angle | eBay (China) |
Programming the GeoRAM/NeoRAM is actually not complicated and I might do another post about it some other day. There are some excellent resources already online if you are interested. Besides GEOS, there are a few other programs that know how to use the RAM extension or that have been adapted to do so. Here’s a short list of exambles:
- Neotunes by TheRyk
- Maniac Mansion adapted by Onslaught
- NeoRAM Drive by enthusi
- MagicFlash64 progammer by Zschunky
- A Bunch of other Games adapted by Stephan Scheuer
Currently I’m working on some minor fixes and improvements to the NeoRAM Remix. When those are done they will be released as rev.2 of the PCB and the entire KiCAD project will be available under a Creative Commons BY-NC-SA license. I’ve also created a variant of my 3D printable NeoRAM case that fits the Remix. This is available for download on Thingiverse as well as on PrusaPrinters.
UPDATE 2019-05-25
The new board revision has been assembled and tested successfully. So, the project files are now available on Github as promised. Also, I put the latest version up on PCBWay for anyone who just wants a PCB.
UPDATE 2021-07-18
I recently created a slightly modified version of the 3D printable case and a label to go with it. The new files are again available on Thingiverse as well as on PrusaPrinters.
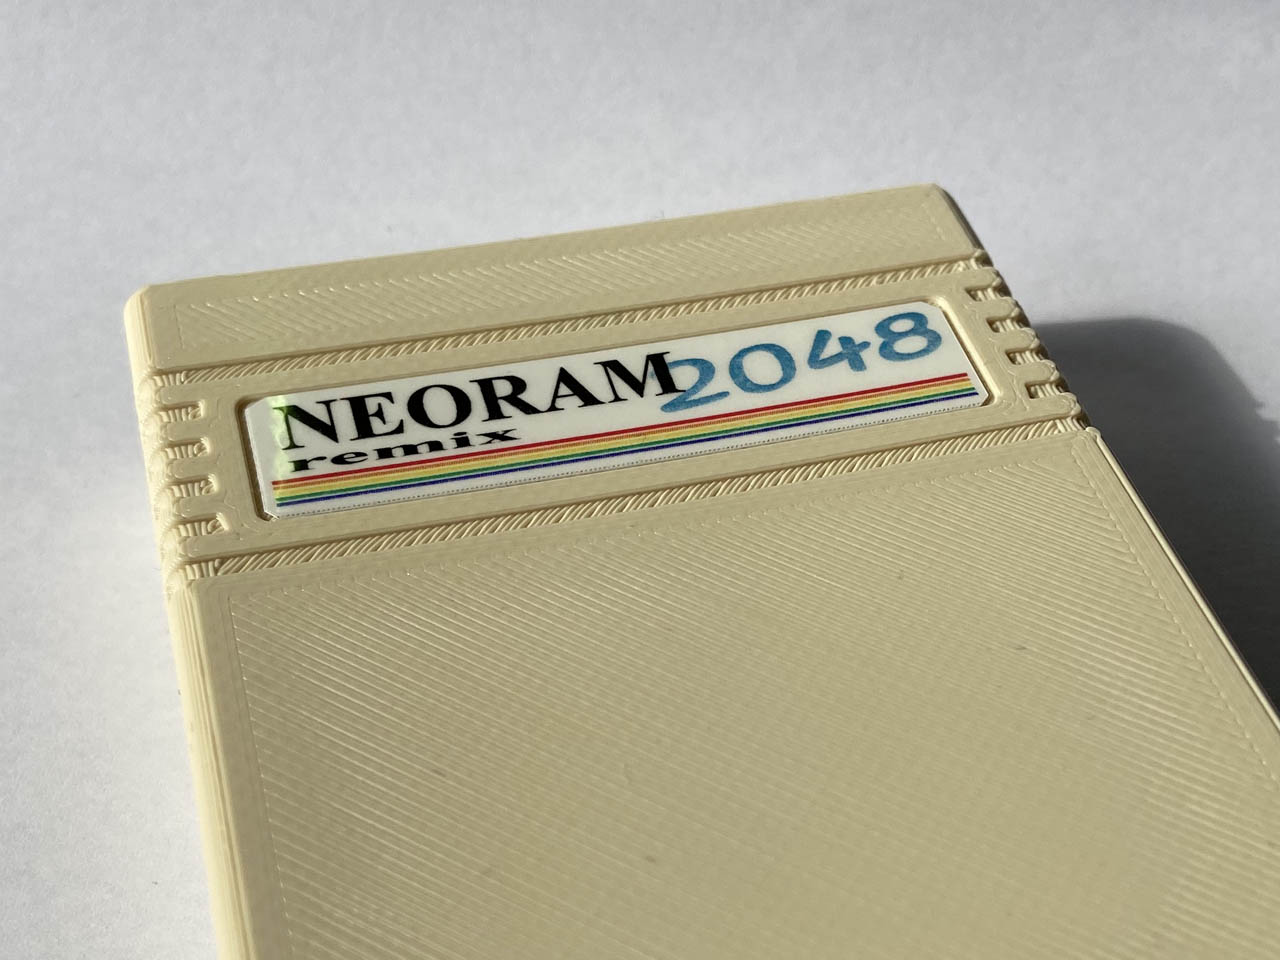
Updated case and label for the NeoRAM remix.


.jpg)
.jpg)
Will this be available for purchase as a whole assembled unit?
What would the price be?
Self assembly is possible, but where do you purchase the PCB?
Or is there a design to be had to be sent off to be manufactured?
No, I won’t be selling assembled units, not even kits. Even if I wanted to, the original license of the NeoRAM actually forbids commercial use. As for the PCB, its already in the post: I’m currently working on a new revision of the layout. Then I’ll order another prototype batch and test it. When all is well, I’ll release the KiCAD project files under a Creative Commons BY-NC-SA license. I might also share it on PCBWay for easy ordering but that’s not decided yet.
Hello,
I think this project is fantastic!
I was wondering would it be possible to substitute 256kb ram chips instead of 512kb into your board?
I realize this would result in overall lower memory capacity.
Or alternatively would it be possible to stack 2 x 256kb RAMTRON chips piggy back fashion to create a 512kb RAM chip that would solder in place of the conventional 512kb DRAM chip?
I found these chips on Aliexpress. I would say without a doubt that they are knockoffs (fake). They are cheap, even the genuine ones are as well. I believe they are a type of nvRAM.
These are a type of Ferromagnetic RAM chip with a similar pinout to regular 256kb DRAM chips. They hold memory after power is lost for a long time without the need of external power.
RAMTRON datasheet
http://www.cpcares.com/pdf/194.pdf
https://www.aliexpress.com/item/33054249162.html
https://www.aliexpress.com/item/33023168831.html
https://www.aliexpress.com/item/32831038887.html
Unfortunately a 512kb RAM chip is not manufactured. A 256kb and 1mb and above are manufactured. Not sure why a 512kb is not manufactured in 28pin parallel package.
Thanks for sharing your project. 🙂
Hello ,
Oops, my apologies for the confusion on my part. I got the memory sizes wrong.
I should have said 128K x 8 1MBit density 32 pin not 256mb ram chips.
So again, I was wondering would it be possible to substitute 128K x 8 1MBit density ram chips instead of SRAM 4M 512Kx8 into your board?
That is an interesting idea but there are a few problems with simply swapping in those memory chips. First, the chip needs to operate on 5V. The PDF you linked to lists such chips with a max capacity of 32k x8 if I’m not mistaken. But it might work to put those on the NeoRAM board if you properly wire Vcc by hand. If this works, it would then not only result in a lower capacity but the memory would be non-contiguous. There would be 32kB on RAM followed by a “gap” of 480kB followed by the next 32kB etc.
I appreciate your valued feed back.
I am very new to all this.
Quite by accident, while I was looking at Cypress’ product pdf.
https://www.cypress.com/file/151456/download
I noticed a SOIC 32 pin memory chip which is CMOS static RAM organized as 512K x 8-bits.
CY62148ELL-55SXI.
https://www.cypress.com/file/43851/download
This device features advanced circuit design to provide ultra low standby current.
If I am reading the data sheet correctly. It has a standby current of 1uA and an operating voltage of 4.5V to 5.5V.
There is also this one.
I think it’s a SOIC 32 pin memory chip which is CMOS static RAM organized as 512K x 8-bits…
CY62148GN-45SXI.
If I am reading this data sheet correctly (skip down to the page 11 of the document for the 5v version number).
It has a standby current of 3.5uA and an operating voltage of 4.5V to 5.5V.
https://www.cypress.com/file/220611/download
Would either of these be beneficial regarding memory retention in your NeoRAM Remix circuit?
Just a thought.. 🙂
Hello,
I have orderd 10 PCBs at PCBway. I will use only one of them. Somebody interested?
Hi, I have ordered some PCBs and will assemble them, but I was interested to know if you had issue with me selling the assembled units on my webshop?
I see somebody here already asked about buying assembled units so I think there is a small demand.
Please let me know if its ok, thanks.
Thanks for asking, but I’m afraid the short answer would be: no, that would not be okay for me.
As discussed above, I’m not the original creator of the NeoRAM and my work on the Remix is heavily based on that of others. The license of the original schematics prohibit commercial use and I have honored that decision by explicitly choosing the Creative Commons BY-NC-SA license for my own project. So, I would need to kindly ask you to check with the original author for permission, first.
That’s cool. Exactly why I asked! It’s a shame as it makes it hard for the less techical people to get them.
I will see if I can find the original creator and ask him about maybe a small run etc.
I am completely on board with the open hardware thing though and will honour the non-commercial licence.
Thanks for your understanding. The original author shouldn’t be hard to find. Your best chances to get in contact would be on forum64.de or via his own site x1541.de.
Could you write some description about the v3 gerber package also?
Ordered 15 pcbs, 13 already have their owner! Thanks for your effort!
The only difference between revisions 2 and 3 is the updated footprint for the battery holder. With revision 3, some SMD battery holders should fit, too.
Also, please note that commercial use of the project and Gerber files is not permitted by the license, as discussed above.
Thanks for your reply.
I ordered the 15 pcs and all of them were sold (bare PCB) on the price of the production to around 12 different guys. I have not earned a penny on it and I believe this is in align with the original license.
I wouldn’t call this ‘commercial use’ at all…
No, I wouldn’t call that “commercial” either. That’s totally cool then, no offense. It was just meant as a general reminder as I’ve seen assembled units being sold here and there.
Ok, I thought it will be ok. Just letting you know that in Hungary there will be at least 15 pcs of it. Small country, small batch.. 🙂
On the other hand I was wondering why on earth does it work the way that only 256 bytes are mapped in at a time. Then I realized that if it would map into either $8000, $A000 or $E000, then the writes would have gone to the underlying built-in RAM. I need to look up how did the REU overcome this issue…
I made 2 Neoram REV3 a 2MB and other 512KB, the test works and other software
but can not use Neoramdrive or Georamdrive, the C64 crashes, the software works very well with Vice.
An idea why?
Has anyone figured Thierry’s problem out, or have any thoughts on it? I too have encountered this problem. My NEOram cartridge (I made a couple 2mb as well as a 512k version trying different parts/brands combinations), and they test fine, run perfect in GEOS, but when I run the neoramdrive or georamdrive programs, they run ok… but when I do a LOAD”$”,2 the screen fills with garbage characters, then the machine crashes. I’ve tried it on numerous 64’s (NTSC and PAL) as well as a 128 in 64 mode. Does the same thing on all the machines. I tried different brands of RAM, different brands of IC’s, nothing seems to make a difference.
I’ve further confirmed that the computers are ok, as I have an original Berkeley Softworks GEOram cartridge, and that works fine with the ramdrive software, and everything else… Just the NEOram cartridges that are having problems.
Is it possible that there could be something wrong with the remix PCB?
Hopefully someone has some thoughts.
That is strange, I just tested this and I’m getting the same error. I also tried the “original” NeoRAM that I have and that one also shows this behavior with NeoRAMdrive. Every other software I tried works perfectly both on the original NeoRAM and on the remix. I will investigate and ask for advice on F64 but both might take time.
Hi Tom, I have the same problem as you, I thought it could be the IC 74HCTxx, it come from China can be counterfeit. like you I have 2 Georam 2Mb and 512K cards.
Once editing the Georamdrive.prg file, I managed to use it
by default it is on 2 Meg it is necessary to just change a value 1F in 07 has the address 0D4E to put it in 512k.
for me it worked once then nothing.
it should be contact the author, the other software works well (sorry for my English Google translation).
Thierry
Thank you FB, if it is necessary to test no prb for me, the Georamdrive is very practical and I would like to use it.
sorry, thank you CG 😉
Figured out the problem. You have to initialize the drive first.
After you load NEORAMDRIVE, and do the SYS57E3 or SYS57000, then type this and hit return:
LOAD” {commodore left arrow key}”,2
The screen will flash a bit briefly, and that’s it. The drive is ready to use. Now you can use your LOAD”$”,2 or save to your hearts content. Just make sure your battery is in place so you don’t lose the contents. Unless you pull the battery, you only have to do it once.
Have one other question for you guys. Where do I find a config program that will recognize the 2mb of ram that’s on the fully loaded NEOram from within GEOS?
I’m running GEOS on the 64 using version 2.0r, but the config program only shows 512k even though I have a 2mb card plugged in. I figure there must be a modified version but have had no luck finding it.
Any help would be appreciated. Thanks.
For me LOAD “CRSR left”, 2 is always a frozen screen!
for Geos you have to change 2 files CONFIGURE and GEOBOOT, choose your configuration.
you find them here: http: //cbmfiles.com/geos/geos-12.php
I understood my mistake !!! I type LOAD “<=", 2 instead of LOAD "<-", 2 and it works very well. ;))
Thanks for the tip on the GEOs programs I need. I’ll give those a try. Glad you figured out what I meant on my message. I should have said the top left arrow key on the C64 keyboard…
For the life of me, I can’t find anywhere on the internet where that “initialization” is explained. I know I came across it SOMEWHERE once, but do you think I can find where that is again? Nope…
At least we have it figured out now, whew!
The initialization is actually explained in the README file that comes with the NeoRAM Drive software.
I have this with a new battery but whatever i put on it in Geos disappears with power off….can’t find what i am doing wrong…..
I haven’t tried GEOS with the NeoRAM myself but I can’t see why it shouldn’t work. So I assume, there is something wrong with the hardware of your cartridge. With so little information it is hard to be more precise. Try some other software first, like NeoTunes or NeoRAM Drive to check if the device keeps its state.
Hi
This is a very interesting project!!!
I’m new to the C64, just started. Could someone explain what the main differences to a REU unit in terms of using would be? Can it only be used with GEO or is it more universal?
Beware using this on a c128, my 128 was working fine until i plugged this NeoRAM card, now my 128 is dead
Hi, thanks for sharing your knowledge with the community.
I was wondering if you have ever considered releasing a revisited neoram remix with the following modifications/add-ons:
– replace tht logic chips by smd chips
– remove two ram chips (so only 1mb)
– adjust footprint to one half of the board
– integrate your revisited sd2iec into the other half
– replace standard sd socket by micro sd socket
This would give geos users a pseudo 1581 drive on SD and a 1581 RAM disk all integrated into the same cartridge.
Just thinking aloud, please don’t take this too seriously.
Hi, for 512k and 1Mb, have i to cut the pre-made soldered path in SJ3 and SJ4? If i solder pin 2 and 3, it will be soldered 1+2+3 (because 1 and 2 are soldered by default)
Thank you
Yes, the PCB is preconfigured for 2MB of RAM. If you want to configure it differently, see the table above. On each solder jumper, either pin 1 OR pin 3 must be connected to pin2, never both. So, you might need to cut the connection between pin 1 and 2 depending on your configuration.
Hi,
I just built one and am trying to debug why LOAD “$”, 2 just put out endless junk on the screen.
I built one with ALL the passive components, except for the battery holder, assembled AND ONLY ONE HM628512ALFP-70 installed for U1.
I cut the traces from 1-to-2 of SJ3 and SJ4 and connected traces 2-to-3 of these jumpers, per the instructions.
Do I need to patch a wire from ground to the /CS pin of the SRAM chip, that is, U1’s /CS pin, since I don’t have the battery holder installed?
How does one initializes the content of the RAM drive?
Also, I get a frozen screen when trying to initialize the RAM drive with LOAD “<=",2.
The "<=" is cursor LEFT key.
I bought the HM628512ALFP-70 from AliExpress. So that could be crappy fake chip as well!
The „<=“ should be the left arrow key found in the upper left corner of the keyboard, not the cursor key.
Also, if you aren’t sure whether your hardware is working properly I’d suggest you use a test program like this one to check it first.
That did it! LOAD “<-", 2 where "<-" is the left arrow key at the upper left corner of the keyboard.
"LOAD "$", 2" shows the below.
NEORAM-DRIVE
8184 BLOCKS FREE
READY
When I entered the below. And pressed , my C64 freezes!
10 PRINT “HELLO, WORLD!”
Aha! I know why my C64 froze when entering a BASIC program. You must first type “NEW” to clear out the NEORAM DRIVE program that you loaded. It has a BASIC statement.
After that, I can save and load any program I want into the RAM DRIVE!
Thank you! AWESOME PROJECT!
Hi there. You’ve inspired me to build up a neoram. Is there a compelling reason to build it with just 512k rather than 1 or 2mb? In looking around at programs aside from geos that will take advantage of the cartridge, I see a number if them indicating they work with 512k. Does this mean they will NOT work with larger capacity?
Since I don’t have much smd soldering experience, I’m tempted to build it as just 512k. I am looking for the most compatibility, but am willing to build it with 1 or 2mb if I am better off doing so.
I am not aware of any program that wouldn’t work on the “larger” versions of the NeoRAM. On the other hand, there are probably some releases that require more than 512k to function. So, component prices and soldering effort aside I see no reason to build one with just 512k. But you could still build one and still upgrade it later.
Great, thank you!
Hi all!
I have built two Neorams using the rev 3 PCB, the 2MB one is detected, but the other one with 512k is not. I cut the SJ3 & SJ4 1-2 bridges, and soldered 2-3 instead as per this page.
I noticed that there are also SJ1 & SJ2 that is bridged 1-2 by default, do these need to be changed as well ? I can not find any documentation on what they are used for.
I must admit, I never used SJ1 and SJ2 myself. They were present on the original NeoRAM so I included them when I created the remix. It has been a while, but IIRC you can use those two jumpers to change how IO2 will be decoded, exactly. They determine which address bits will be checked when writing to $dffe/$dfff and I assume this is supposed to improve backwards compatibility with the GeoRAM in certain edge cases.
In any case, those two jumpers don’t need to be changed for different RAM configurations. Actually, you don’t really need to change SJ3+4 either for the first 512k to work. They will just help the programs to detect that the rest of the memory is just missing.
So, if one of your carts doesn’t pass the test program you should first double check all of you solder joints. If those are all okay, you actually might have a broken component on your PCB, unfortunately.
Pingback: GeoPlayer « NewRetro.OO.gd
Congrats for the great work you have done with neoRAM remix, is really amazing!
I built a board for myself, ordered the pcbs to pcbway. I built it with two 512k.
I tested the board with neotunes and this tool called neoRAM test: http://www.cbmhardware.de/dlmanager/index.php?id=444
Tests passed ok.
The only issue I’ve found so far, is that Sonic the Hedgehog port fails saying “REU not found”.
I guess neoRAM is not 100% compatible with geoRAM? By chance did anyone get Sonic to run with neoRAM?
Thanks and cheers!
Matias,
Thanks for your feedback! The NeoRAM is very much compatible with the GeoRAM. But the REU is a completely different beast. As I’ve tried to explain above, the REU features its own memory controller that will actively swap out areas of the C64’s memory without bothering the CPU. Both GeoRAM and NeoRAM are passive devices, data has to be written and read by the CPU. So, with Sonic heavily relying on the REU, there is no chance to get it to run with just a NeoRAM.
Thank you for your answer.
Lot of fun experiencing with neoRAM.