I’ve covered the PLA and the question how to replace a broken one before. First, when I repaired one of my C64 from back in the day, needed a quick replacement, and used an EEPROM on a simple adapter board. In a follow-up post I used a simple circuit suggested in a talk by Eslapion to test this PLA replacement for glitches and found plenty. Last but not least, I created a replica of the Super Zaxxon cartridge also to be used for testing the PLA. There is a lot more information online on this topic like the excellent Post on Breadbox64.
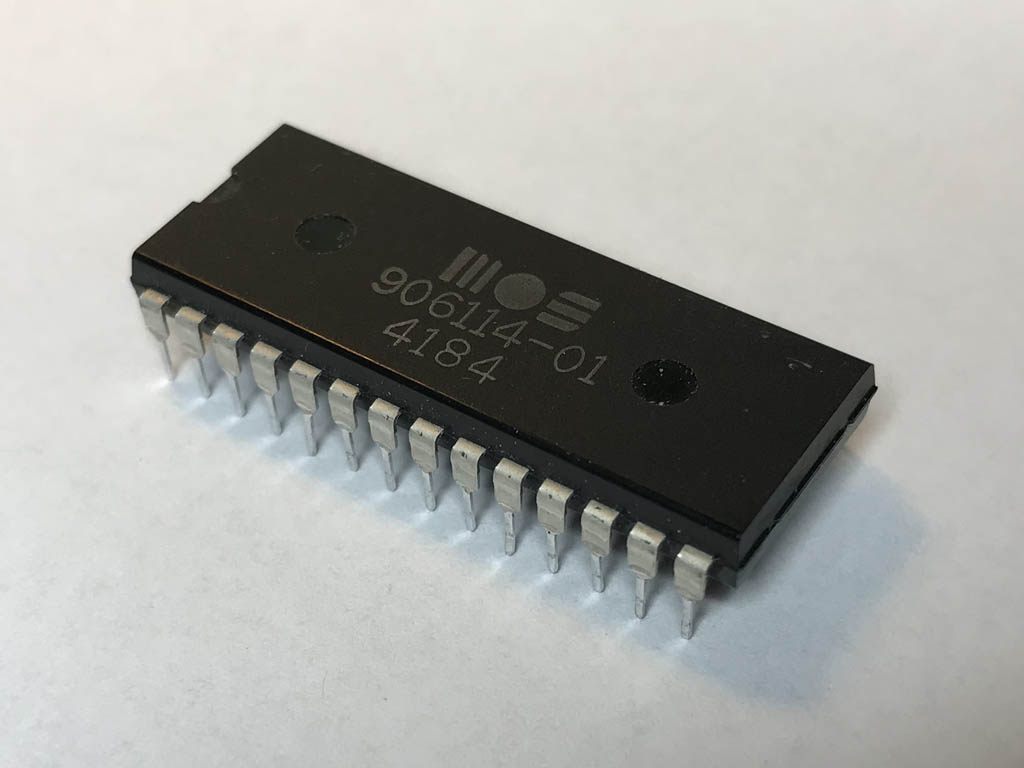
The broken PLA from a C64 mainboard.
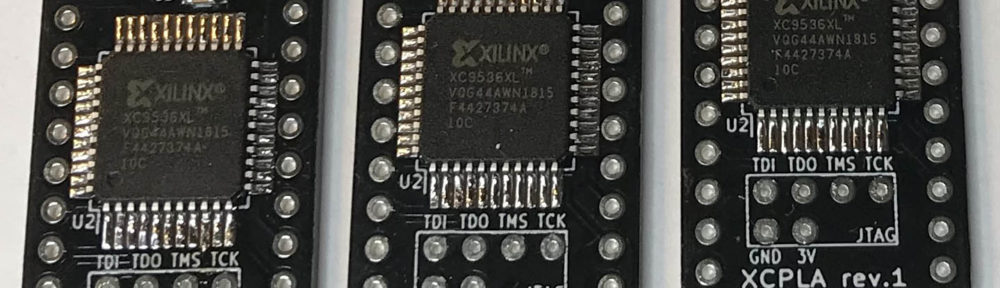
A while back I stumbled across another open source DIY solution for replacing the PLA called the DodgyPLA. This variant is almost as easy to build as the EPROM adapter but promises far better compatibility, so I got curious. Like the U17 PLAnkton it is based on the XC9536XL CPLD made by Xilinx. A somewhat unique feature of the DodgyPLA is its single sided layout that is optimized for self-etching.
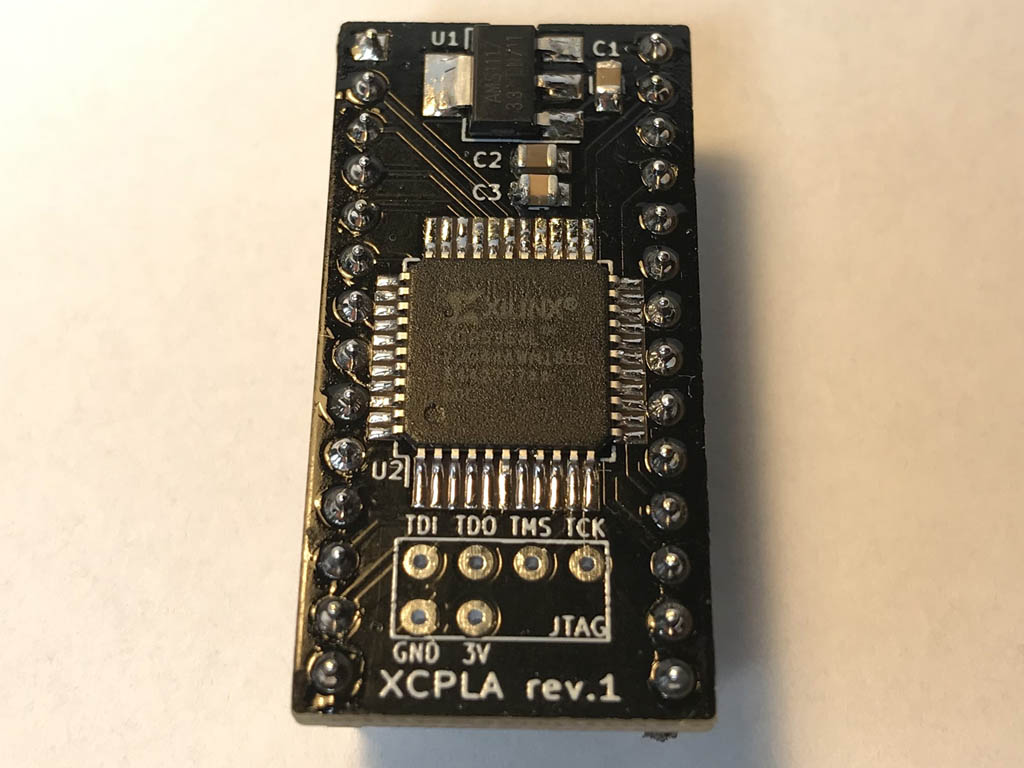
The assembled XCPLA.
But since I wasn’t in a hurry and PCB production is so easy and cheap these days I created my own board layout with a more accessible JTAG header and dubbed it the XCPLA. All my modifications are available on Github of course, under the same license as the original DodgyPLA. The BOM for the XCPLA is refreshingly short:
| Amount | Ref | Description | Source |
|---|---|---|---|
| 1 | U1 | AMS1117 3.3 voltage regulator | eBay (China) |
| 1 | U2 | XC9536XL | eBay (China) |
| 2 | C1,C2 | 10uF 0805 ceramic capacitor | eBay (China) |
| 1 | C3 | 100nF 0805 ceramic capacitor | eBay (China) |
| 1 | male pin headers, round | eBay (China) |
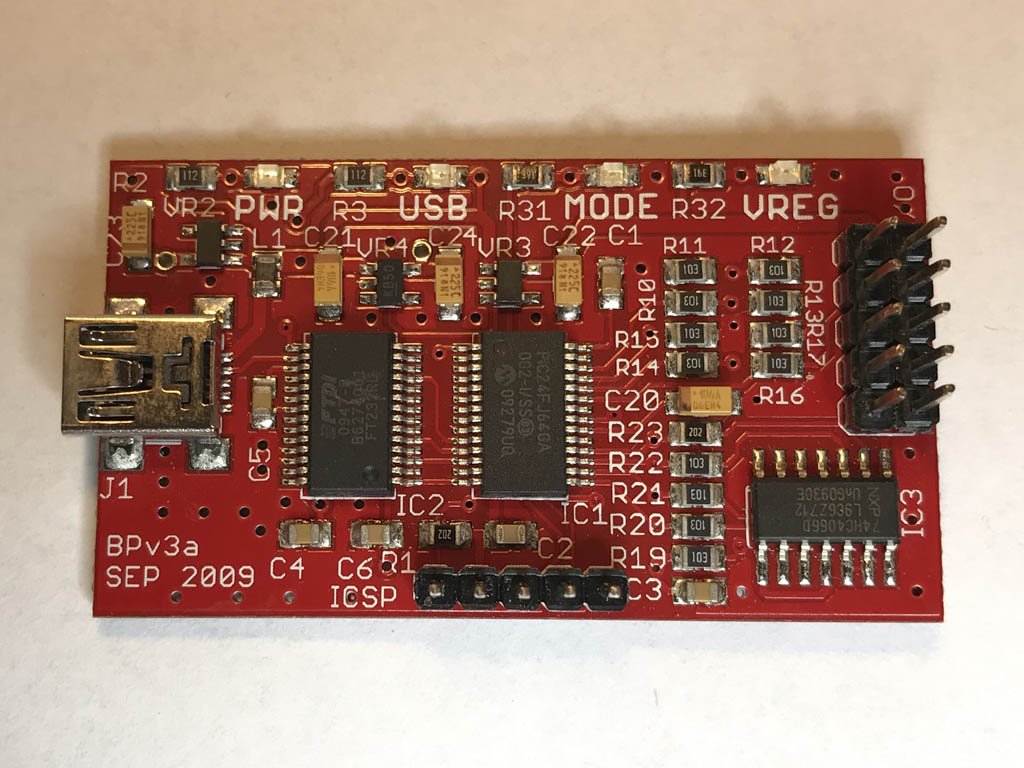
My ancient Bus Pirate wouldn’t do as a JTAG programmer.
When the first PCBs had finally arrived and I had assembled the first unit I discovered that programming the CPLD wasn’t as easy as I had expected. I don’t own a dedicated Xilinx programmer so the plan was to use my (very) early version of the Bus Pirate and OpenOCD instead. But try as I might, I couldn’t get this to work. I was already prepared to wire up a Raspberry Pi instead when I learned about a different approach.

Using an EasyFlash3 as a JTAG programmer.
Someone facing the same problem as myself had connected the JTAG header to the FTDI chip on an EasyFlash3 cartridge. Then he used the easp.exe tool that is normally used to program the CPLD on the EF3 itself. This sounded like a great idea! I tried for myself and it worked like a charm:
easp.exe -p 0x8738 -v dodgypla.svf
Later — still refusing to buy a dedicated Xilinx programmer — I ordered a relatively cheap breakout board with a FT232H chip on eBay. When this adapter finally arrived, I wired it up as a JTAG programmer.
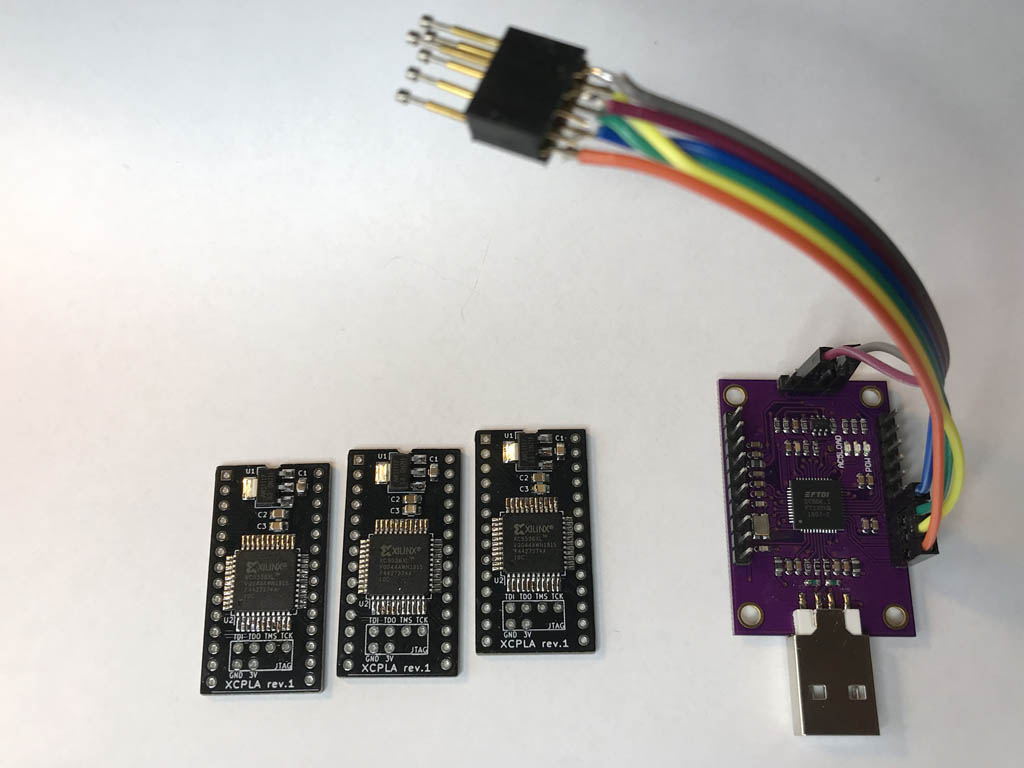
The FT232H as a JTAG programmer.
| FT232H | AD0 | AD1 | AD2 | AD3 | +3.3V | GND |
| JTAG | TCK | TDI | TDO | TMS | 3V | GND |
After another short fight with OpenOCD I was finally able to flash the CPLD directly:
bin-x64\openocd.exe -f scripts\interface\ftdi\um232h.cfg -c "adapter_khz 100" -c "jtag newtap XC9536XL tap -irlen 8 -expected-id 0x49602093" -c init -c "svf dodgypla.svf" -c "sleep 200" -c shutdown
With the programming of the CPLD done, the XCPLA is ready to function as a replacement for the PLA on C64 long boards. Next, I wanted to see if it is an improvement over the simple EPROM based solution. So I wired up Eslapion’s PLA glitch detector circuit again, on a piece of perf board instead of the breadboard this time.
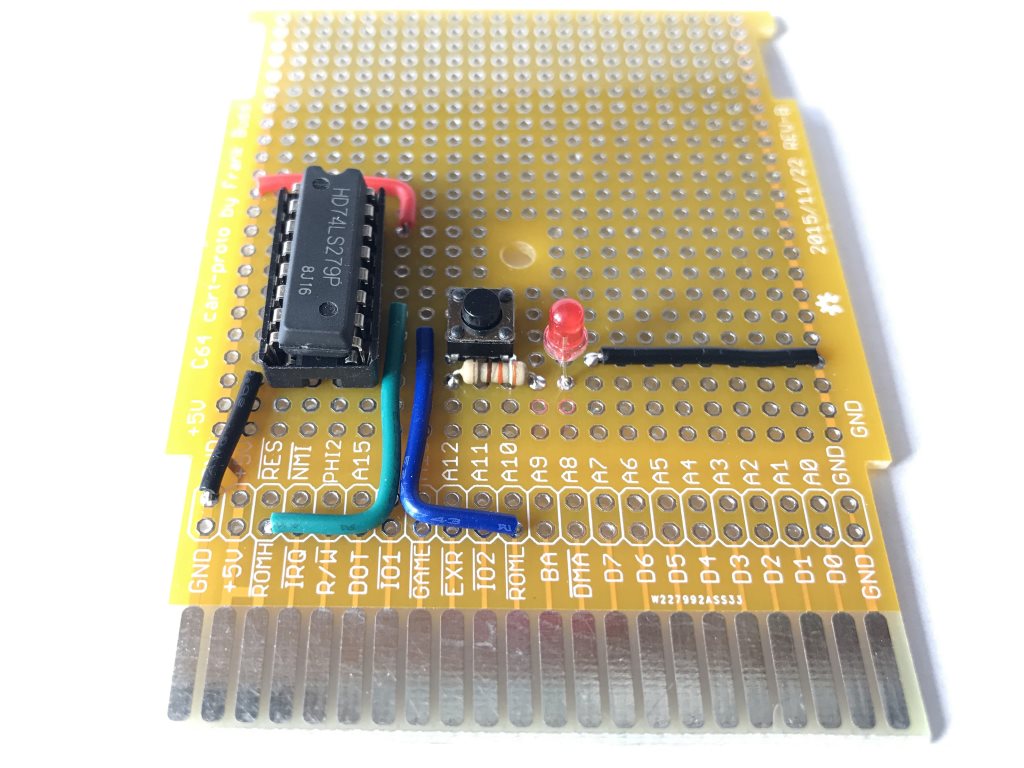
The PLA glitch detector on a prototyping PCB.
As expected, I could easily detect the glitches on the /ROML and /ROMH lines caused by the EPROM PLA and I was happy to find that I would see none of those when using the XCPLA!
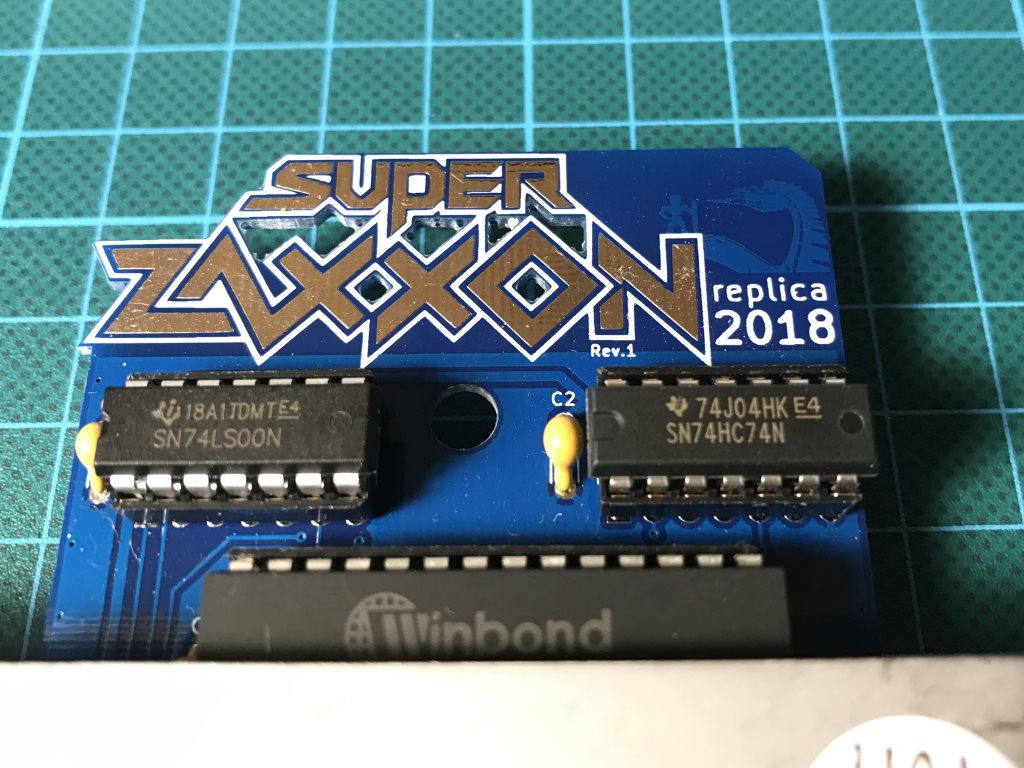
The Super Zaxxon cartridge, extra sensitized for PLA glitches.
Finally, I prepared another simple test for the PLA. In his comment on my post about the Super Zaxxon replica, Eslapion suggested that I replace the 74LS74 flip-flop on the cartridge with a 74HC74 to make it more susceptible to glitches caused by the PLA. And indeed, with the HC logic chip installed on the cartridge and the EPROM PLA on the mainboard, the graphic errors in the game are immediately visible. With the XCPLA on the other hand, Super Zaxxons plays perfectly even with the HC logic chip on the cartridge.
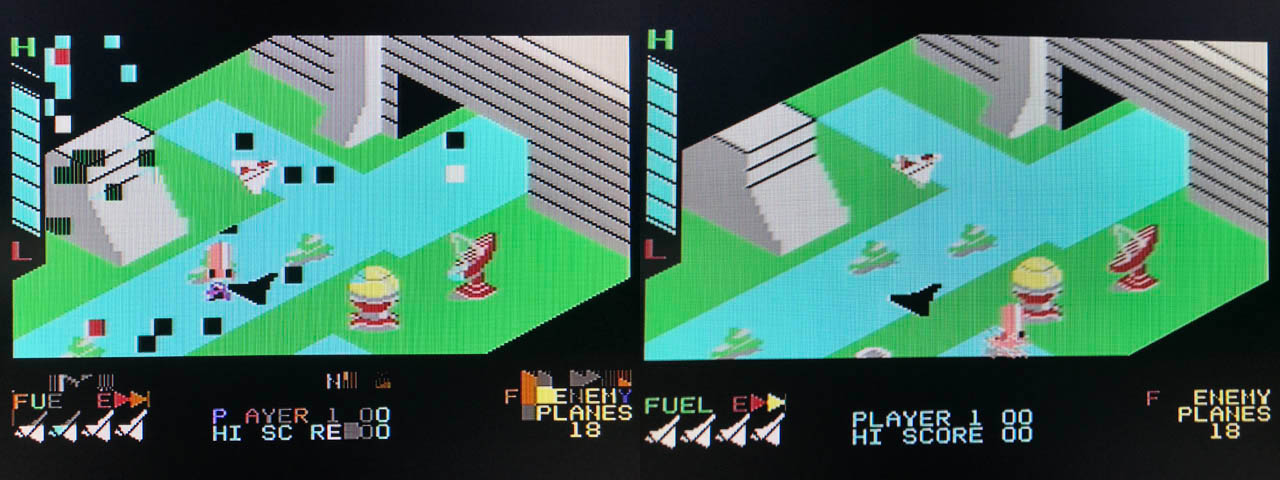
Super Zaxxon with EEPROM PLA (left) and XCPLA (right).
In Summary: The DodgyPLA and its variant the XCPLA are low-cost, fairly easy-to-build replacements for the PLA that provide far better qualtiy than the EPROM based solutions.
Update 2020-05-01
While the XCPLA worked perfectly for me so far, my own testing equipment and range of different C64 boards are quite limited. So I wasn’t surprised to hear from time to time of others who had been having issues with the XCPLA on their boards. Recently, it was brought to my attention in the comments below and on Twitter (Thank you Dan!) that there is another project descended from the DodgyPLA which is using modified delays on the output lines that seem to help resolve those issues in some cases.
I have now included compiled versions of both the original DodgyPLA and the neatPLA core in my repository on Github. If the original version doesn’t work for you, you might want to give the other one a shot. And I’d love to hear from you in the comments whether this helped or not.


Can you please create also a .jed file so it can be used to program XC9536XL directly with Impact?
Many thanks in advance, Enzo.
Done. I added the corresponding .jed file to the repo.
Thanks! Meanwhile I installed ISE DS and generate it, but now I check if I’ve done right! Best regards, Enzo.
Strangely I obtained a 45093 (instead of 43426) byte file. But because already programmed and mounted (seems it works) I leave it to check behavior. Later I’ll etch and build other board and program it with your .jed file instead.
Strange indeed. I have no way of verifying the .jed file directly. But I converted it into an .svf file and the result matched the original one.
If interested to look at it send me a PM and I send it you.
Pingback: Erasing and Programming the ATF1504 CPLD | hackup.net
I want to order some PCBs. You have released a revision 2 on GitHub and done some more commits.
What is the best: rev1, rev2 or master (rev3)?
Don’t order rev.1, rev.2 is the latest revision that I tested. There are some minor improvements to the footprints in master but I haven’t had any boards made with those, yet.
Thanks! BTW the gerber files in the rev2 release are still rev1.
Yes, you are right. I forgot to add those after I tested the boards. They are in the repo now.
I tried to generate the gerber files with KiCad 5.1.5-3 but Seeedstudio couldn’t handle them correctly. Yours are OK. Strange. I just need to wait the components and the PCBs.
Thanks!
Trying to program using a Raspberry Pi 3 and OpenOCD, it detects the device:
Info : JTAG tap: XC9536XL.tap tap/device found: 0x59602093 (mfg: 0x049 (Xilinx), part: 0x9602, ver: 0x5)
But fails when programming:
# openocd -f /usr/share/openocd/scripts/interface/raspberrypi2-native.cfg -c “adapter_khz 100” -c “jtag newtap XC9536XL tap -irlen 8 -expected-id 0x59602093” -c init -c “svf dodgypla.svf” -c “sleep 200” -c shutdown
[snip]
RUNTEST 20000 TCK;
SDR 34 TDI (000f800000) TDO (0000000001) MASK (0000000003) ;
SDR 34 TDI (000f800001) ;
SDR 34 TDI (000f840001) ;
SDR 34 TDI (000f880001) ;
SDR 34 TDI (000f8c0001) ;
Error: tdo check error at line 41
Error: READ = 0x3fffe
Error: WANT = 0x00001
Error: MASK = 0x00003
Error: fail to run command at line 580
Error: tdo check error at line 41
Error: READ = 0x3fffe
Error: WANT = 0x00001
Error: MASK = 0x00003
Time used: 0m0s414ms
svf file programmed failed
Not sure if I messed something up? I accidentally ordered XC9536XL-10VQG44C which is the same chip, just a slightly fatter package. ID comes up as 0x59602093, which I substituted in the command line. Any help would be appreciated!
Hi Dan,
My own OpenOCD knowledge is actually still very limited, so I’m afraid I won’t be able to help you here. Maybe someone else is reading this and can jump in? Using the Raspberry Pi as a programmer should work although I haven’t tried it myself. Maybe the IC is slightly different after all besides having a bigger package? Or it might be faulty? Or some some connection issue?
I hope you manage to solve this somehow. Please let me know when you do!
For the sake of my own sanity, I gave up with the RPi, switched to Windows and bought the exact same FT232H device you have there. I also made some new boards with XC9536XL-10VQ44C (previously used XC9536XL-10VQG44C).
I ran the exact command you ran in your example, it failed in exactly the same way as the Pi:
bin-x64\openocd.exe -f scripts\interface\ftdi\um232h.cfg -c “adapter_khz 100” -c “jtag newtap XC9536XL tap -irlen 8 -expected-id 0x59602093” -c init -c “svf dodgypla.svf” -c “sleep 200” -c shutdown
Open On-Chip Debugger 0.10.0
Licensed under GNU GPL v2
For bug reports, read
http://openocd.org/doc/doxygen/bugs.html
adapter speed: 100 kHz
Info : auto-selecting first available session transport “jtag”. To override use ‘transport select ‘.
Info : clock speed 100 kHz
Info : JTAG tap: XC9536XL.tap tap/device found: 0x59602093 (mfg: 0x049 (Xilinx), part: 0x9602, ver: 0x5)
Warn : gdb services need one or more targets defined
svf processing file: “dodgypla.svf”
TRST OFF;
ENDIR IDLE;
ENDDR IDLE;
STATE RESET;
STATE IDLE;
FREQUENCY 1E6 HZ;
adapter speed: 1000 kHz
[snip]
RUNTEST 20000 TCK;
SDR 34 TDI (000f800000) TDO (0000000001) MASK (0000000003) ;
SDR 34 TDI (000f800001) ;
SDR 34 TDI (000f840001) ;
SDR 34 TDI (000f880001) ;
SDR 34 TDI (000f8c0001) ;
Error: tdo check error at line 83
Error: READ = 0x000d00093
Error: WANT = 0x000000001
Error: MASK = 0x000000003
Error: fail to run command at line 580
Error: tdo check error at line 83
Error: READ = 0x000d00093
Error: WANT = 0x000000001
Error: MASK = 0x000000003
Time used: 0m2s368ms
svf file programmed failed
Full output is here: https://pastebin.com/xjSs20bJ
The mismatch in ID seems to stem from the CPLD hardware version being bumped from 4 to 5:
Info : JTAG tap: XC9536XL.tap tap/device found: 0x59602093 (mfg: 0x049 (Xilinx), part: 0x9602, ver: 0x5)
Warn : JTAG tap: XC9536XL.tap UNEXPECTED: 0x59602093 (mfg: 0x049 (Xilinx), part: 0x9602, ver: 0x5)
Error: JTAG tap: XC9536XL.tap expected 1 of 1: 0x49602093 (mfg: 0x049 (Xilinx), part: 0x9602, ver: 0x4)
I’m thinking this SVF is somehow incompatible with this later chip, but I have zero knowledge of the format. I can run this test SVF file against it on either Windows or the RPi:
https://github.com/hansiglaser/vhdl-svf/blob/master/svf-files/test-xc9536xl.svf
I have literally nothing left to try. Buying more hardware didn’t solve anything, as I feared. I had a bad feeling about this project from the start, something about these Xilinx chips and the whole JTAG thing. If anyone can offer any further suggestions, it would be much appreciated.
Thanks so much for reaching out on Twitter. Your suggestion to change the FREQUENCY parameter in the SVF file worked for me, reversing the change in this commit resolved all the issues I was having:
https://github.com/hackup/c64-dodgypla/commit/c4307d913b3d4ec0094486d97f9248d5b787c523
I was able to reliably program 10 devices using a Raspberry Pi 3. These were the required steps:
1. Enable JTAG in the configuration file /usr/share/openocd/scripts/interface/raspberrypi2-native.cfg by removing the hash mark from the “bcm2835gpio_jtag_nums” line so it reads:
# Each of the JTAG lines need a gpio number set: tck tms tdi tdo
# Header pin numbers: 23 22 19 21
bcm2835gpio_jtag_nums 11 25 10 9
2. Connect the XCPLA to the GPIO header matching the above:
TCK – Pin 23 (GPIO 11)
TMS – Pin 22 (GPIO 25)
TDI – Pin 19 (GPIO 10)
TDO – Pin 21 (GPIO 9)
3. Change the frequency in the SVF file:
# sed -i “s/^FREQUENCY 1E6/FREQUENCY 3E5/” dodgypla.svf
4. Run OpenOCD:
# openocd -f /usr/share/openocd/scripts/interface/raspberrypi2-native.cfg -c “adapter_khz 100” -c “jtag newtap XC9536XL tap -irlen 8 -expected-id 0x59602093” -c init -c “svf dodgypla.svf” -c “sleep 200” -c shutdown
Just a tip. I was having issues with TDO errors while using the FT232H. Some boards worked, some did not. I accidentally discovered that if I put a -d at the end of the openocd command, it would display debug information which slows down the programming process and completes successfully every time now. It might not be the best solution as it takes a little longer to program, but hopefully this will help some people out.
Okay, so after reading a post from yesterday, I was able to eliminate the TDO errors I was getting by slow down the programming from the FT232H by just changing the FREQUENCY line in the svf file.
By default it reads FREQUENCY 1E6 HZ; which is 1MHz.
I dropped it down to 800kHz by changing the line to FREQUENCY 8E5 HZ;
Changing the 8 to a 6 would drop it down to 600kHz.
I played with the numbers until I got a good compromise between speed and reliability. Hope this helps!
The capacitor values for C1 and C2 in the main text might need reviewing, as it says 10uF while the KiCad net list shows 3.3 uF (this is the value I used).
That is indeed part of the DodgyPLA heritage and has been discussed briefly. The exact value for these caps doesn’t seem to matter much. I have used 10uF for the AMS1117 in other projects so that is what I used here. But you are right, I probably should have mentioned that in my post.
Thanks again for the update. One last thing, I had a problem with crackly and distorted audio when using XCPLA with a Nano SwinSID in an older motherboard. The owner of the neatPLA project altered some of the timings to overcome this, see https://github.com/desaster/c64-dodgypla/issues/4.
I was able to generate new JED and SVF files to apply these tweaks, which seems to have worked fine so I forked your git repo to https://github.com/modeler/c64-dodgypla with these changes. Hope that’s okay, if you wanted to include these in your repo as alternatives I shall delete mine.
Thanks for letting me know! I didn’t have any issues with the XCPLA on my boards, but I’ve heard from others who were experiencing instabilities. Maybe the improved timings of the neatPLA will help them. I just compiled the modified core myself and programmed it onto one of my XCPLAs. I’m not having any issues with this version either. I’ll add the files for both versions to the repo and post a quick update when I find the time.
Pingback: C64 PLA replacement guide – silvestron's bits and bytes