As hinted at earlier, I made a couple of mistakes when designing version 1.0 of the WifiModem64 and they will be fixed in version 1.1.
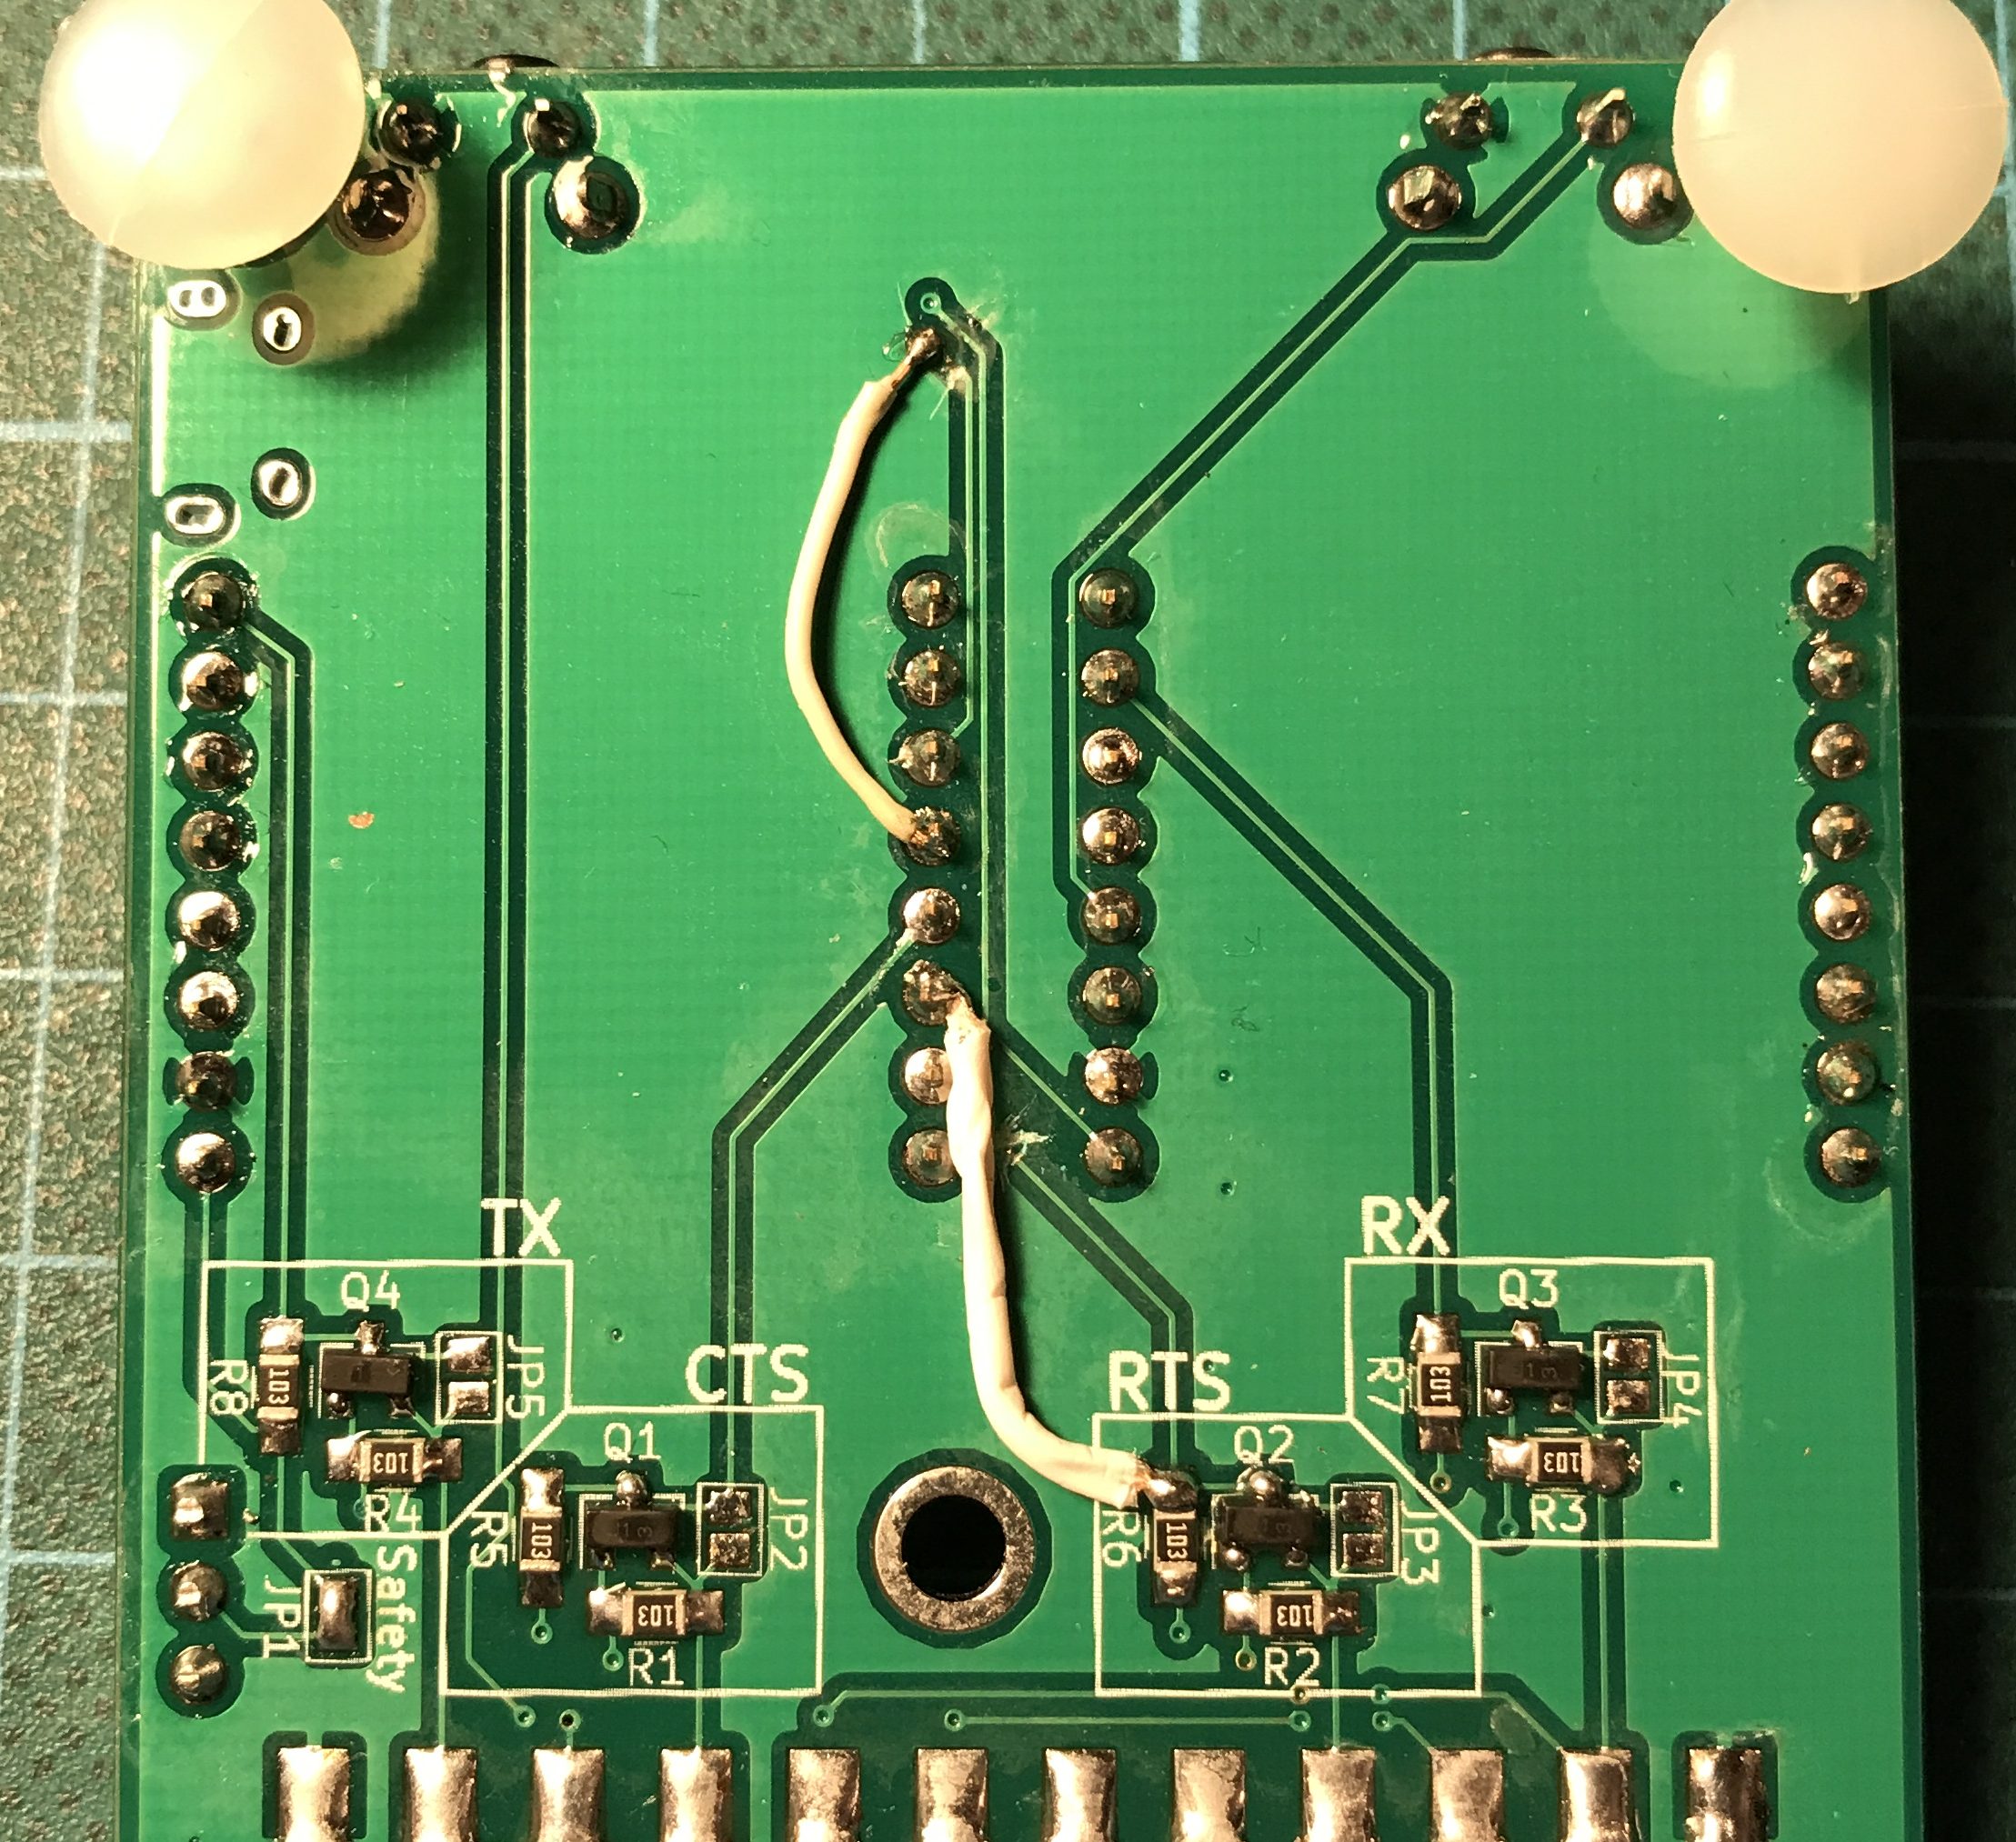 Still, with some minor manual modifications, those first boards are still usable. In short, RTS must be connected to WeMos D7 instead of D8 for the ESP8266 to boot reliably and the WS2812 LED must be connected to WeMos D5 instead of D0 if you intend to use it.
These are the step-by-step instructions to get WifiModem64 V1.0 on line:
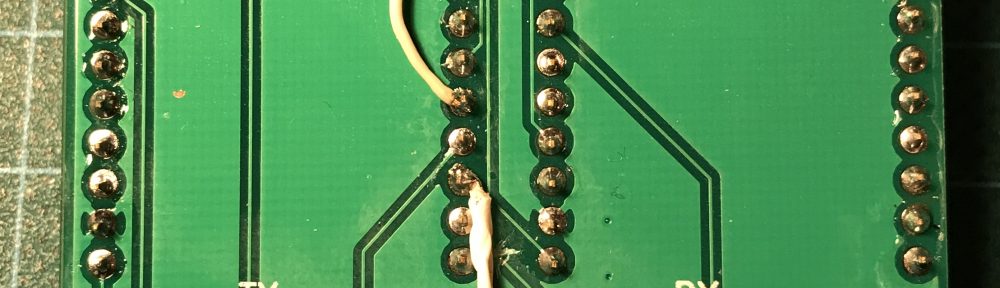
1. Re-route RTS
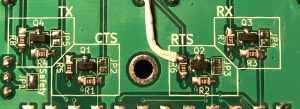
Take a sharp knife, small screw driver or some other suitable tool and carefully cut the old trace to WeMos D8, which is marked (1) in the image below. Use a multimeter to make sure there is no more connection between R6 and WeMos D8. Solder an insulated piece of jumper wire between R6 and WeMos D7.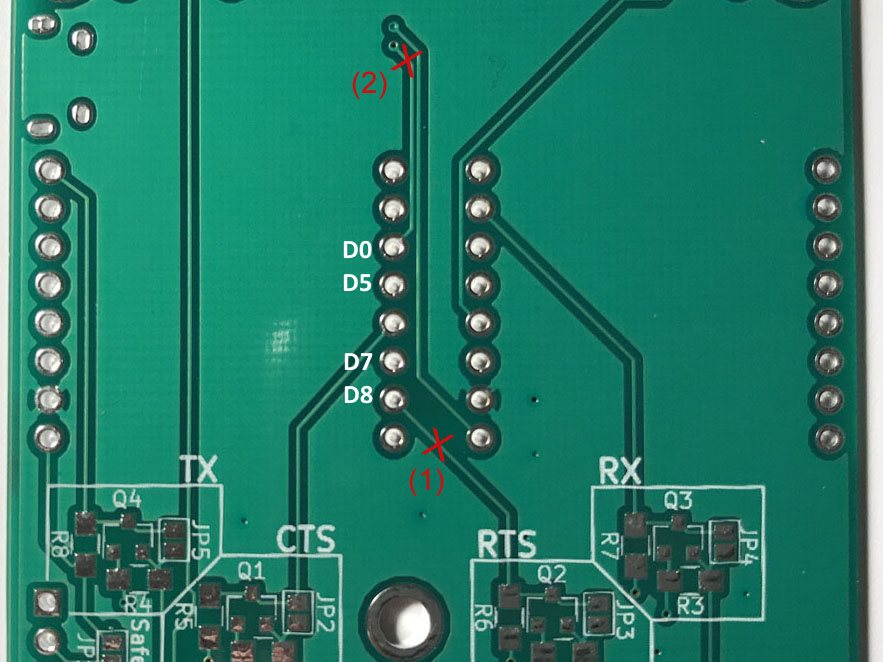
2. Re-route RGB LED
Take your tool of choice from step 1 and carefully cut the old trace to WeMos D0, which is marked (2) in the image above. Use a multimeter to make sure there is no more connection between DATA_IN of the WS2812 and WeMos D0. Solder an insulated piece of jumper wire between DATA_IN and WeMos D5.
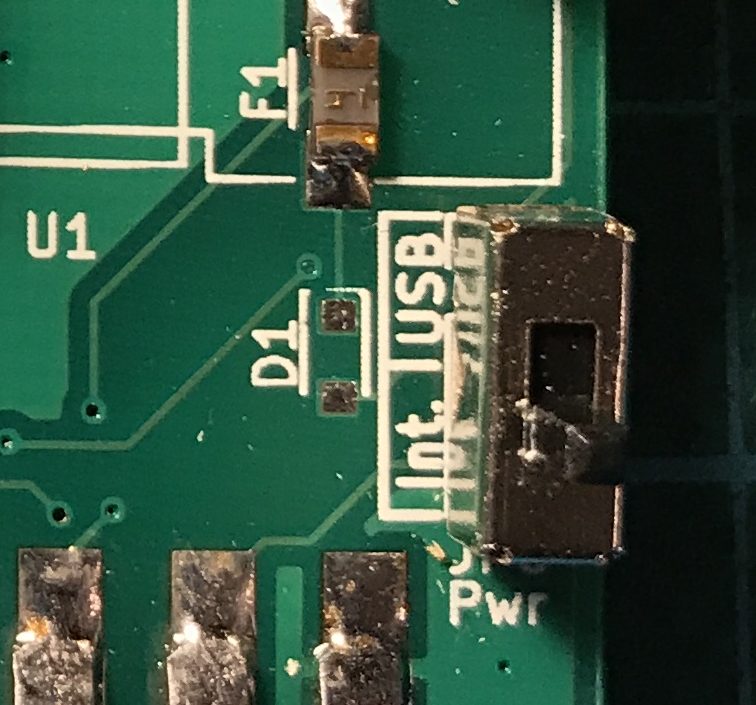
3. Power Safety
Either fit components D1 and F1 on the top side of the PCB (diode and fuse), or close solder bridge JP1 on the bottom side.
4. Power Source
Fit either a 3 pin male header to JP6 and use a jumper to select between internal and external power supply or use a matching toggle switch instead.
 5. Level Shifter
Depending on whether you believe that the ESP8266 needs level shifters on the data lines (I actually don’t), either fit the components R1-R8 and Q1-Q4 to the bottom side of the PCB, or close the solder bridges JP2-JP5.
 6. WeMos Headers

Solder 8 pin female headers to the top side of the PCB to hold the WeMos module(s).
7. User Port Connector
Bend the copper leads of a user port connector slightly inwards, slide the PCB in between and solder all 24 leads to their respective pads on the PCB.
8. Optional Components
Depending on whether you intend to use them, fit any of the optional components:
- baud rate reset switch SW1
- C64 reset switch SW2
- micro USB connector J2 for external power
- LED1 and C1 for the RGB status LED
- WeMos OLED display on U2
Please note that firmware support for the RGB LED and the OLED display is still being developed!
9. Flash Firmware
Make sure the WeMos D1 mini is NOT connected to your C64 before flashing the firmware. Then there are two options. If you’d like to compile the firmware yourself:
- Install the Arduino IDE
- Install Arduino Core for ESP8266
- Fetch the WifiModem64 project
- Open, compile, and upload
WifiModem64.ino
If you’d rather flash my pre-compiled binary:
- Download and extract the archive
- Follow the instructions to upload to the ESP8266
10. Initial Setup
Follow Alwyz’s instructions for the initial setup of the modem if you want to use it at 9600 baud.
Components
To save you from the need to open the actual schematics when soldering components to the board, here is the relevant part of the BOM:
| D1 | B5819WS | |
| J1 | C64 User Port Connector | |
| U2 | WeMos D1 mini OLED Shield | eBay|China eBay|Germany |
| R1-R8 | 10k (0805) | eBay|China eBay|Germany |
| U1 | WeMos D1 mini | eBay|China eBay|Germany |
| LED1 | WS2812B | |
| C1 | 100n | eBay |
| F1 | 0.5A (1206) | |
| J2 | USB_B | eBay |
| Q1-Q4 | BSS138 | eBay |
I’m interested in putting one of these together. Did you ever get around to making a new version of the PCB?
Yes, I incorporated these fixes in version 1.1, it is available in the repo on Github. But I never did get around to having it actually made and to testing it. So, you are welcome to try it out, but no guarantee. Please let me know the results if you do. 🙂 I could supply you with the Gerber files for v1.1, just let me know.
I’ll keep that in mind, thank you. Where do you go to get your PCBs milled?
In China. 🙂 There are 4 or 5 different PCB services that I’ve used in the past depending on who offers the best deal for the particular project.