As you might have read in my previous post, I retrieved my old Commodore hardware from the attic and found it still working. Even most of the 5 1/4″ floppy disks that I inserted into one of the squeaking 1541 drives seemed still readable. So, I decided this might be the last chance to save those very early lines of code from oblivion that I had written so many years ago. Not that it was really worth it, it’s mostly a matter of principle to not let a single bit of code get lost if I can help it. To convert what was still readable to d64 disk images, I first needed to make a suitable adapter cable.

The XA1541 seemed like a good choice to start. It’s an adapter to connect the Commodore 1541 disk drive to the parallel port of a PC. While there are other solutions, the XA1541 seemed easy enough to build and reported to work with most (all?) parallel ports found in today’s PCs. If there is a parallel port to be found at all. We’ll cover that in a later post on making a XU1541 cable, though.
Also, there are excellent instructions by Stefan Uhlmann on how to make one of these. The page is available in German only but very well illustrated.
All that is needed are two connectors (obviously), a length of shielded wire, four resistors, and four transistors to drive the interface. Just as Stefan suggested, I wanted to fit the active components onto a small piece of prototyping board inside the D-sub casing of the parallel port connector. The first step is to cut the board so that it will fit into the casing while still leaving as much room for the components as possible.

Fitting the board into the connector’s casing.
The board fits smoothly between the two rows of the D-sub connector, and the connector is then soldered directly onto the board. The lead-wire spacing of the connector does not match that of the prototyping board, but that doesn’t matter. Only the four left most leads 14-17 of the connector, marked with a green box in the picture, must not be shorted. The other leads 18-25 on this side get all connected to GND anyway.

Do not shorten pins 14 – 17.
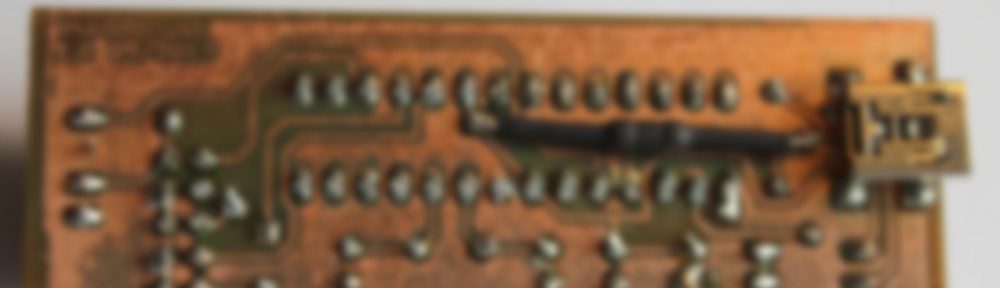
Next, I placed the four resistors and transistors on the board and fixed their wires with soldering points.

It really helped and saved time to have Stefan’s images as a guideline. Since I placed the components exactly where Stefan did, all I needed to do then was to spread solder onto the copper side of the board until the shiny pattern looked like the one on Stefan’s picture.

Finally, the the leads from the shielded wire are attached and everything gets stuffed into the D-sub connector’s casing. The DIN connector fitting into the Commodore IEC serial bus is soldered to the other end of the cable and we’re all done.

The XA1541 is ready to connect our trusty 1541 drive to our PC. Using a great piece of code called OpenCBM (formerly known as cbm4linux) we are now able to access the data from the 5 1/4 inch disks.


