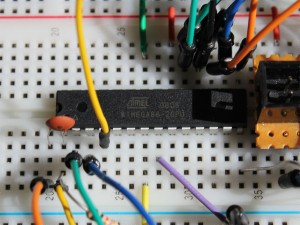
In preparation of the quest to build my own wireless sensor network I spent some time in getting a minimal Arduino up and running based on the ATmega8 chip. It was not before I finally succeeded that I realized it would be of no use in this case, because the ATmega8 lacks the ability to trigger an interrupt handler through its watchdog timer. So, I wouldn’t be able to use its power down sleep mode.
I then found a couple of ATmega88 chips in my stockpile, which aren’t subject to this limitation. Fortunately, setting this one up as a minimal Arduino turned out to be much the same. I mostly followed an existing guide, but added the Optiboot bootloader to the mix.
I first needed to compile the bootloader for the use with the internal osciallator at 8Mhz. So I added the following lines to arduino-1.0.5-r2/hardware/arduino/bootloaders/optiboot/Makefile:
atmega88_8: TARGET = atmega88
atmega88_8: MCU_TARGET = atmega88
atmega88_8: CFLAGS += '-DLED_START_FLASHES=3' '-DBAUD_RATE=19200'
atmega88_8: AVR_FREQ = 8000000L
atmega88_8: LDSECTIONS  = -Wl,--section-start=.text=0x1e00 -Wl,--section-start=.version=0x1ffe
atmega88_8: $(PROGRAM)_atmega88_8.hex
atmega88_8: $(PROGRAM)_atmega88_8.lst
I limited the baud rate to 19200 as greater values turned out to be less reliable in my setup. For this to work, I had to explicitly disable SOFT_UART in optiboot.c:
/* Switch in soft UART for hard baud rates */
#if (F_CPU/BAUD_RATE) > 280 // > 57600 for 16MHz
#ifndef SOFT_UART
//#define SOFT_UART
#endif
#endif
With that you can build the bootloader by running make atmega88_8 or omake.bat atmega88_8 on Windows in that same directory.
Next, I added the new Arduino type to arduino-1.0.5-r2/hardware/arduino/boards.txt. It should have been possible to add the board definition to a boards.txt file below the sketchbook directory but that did not work for me and the current version of my Arduino IDE.
atmega88_8.name=ATmega88 Optiboot (8MHz internal OSC)
atmega88_8.upload.protocol=arduino
atmega88_8.upload.maximum_size=7680
atmega88_8.upload.speed=19200
atmega88_8.bootloader.low_fuses=0xe2
atmega88_8.bootloader.high_fuses=0xdf
atmega88_8.bootloader.extended_fuses=0x00
atmega88_8.bootloader.path=optiboot
atmega88_8.bootloader.file=optiboot_atmega88_8.hex
atmega88_8.bootloader.unlock_bits=0x3F
atmega88_8.bootloader.lock_bits=0x0F
atmega88_8.build.mcu=atmega88
atmega88_8.build.f_cpu=8000000L
atmega88_8.build.core=arduino
atmega88_8.build.variant=standard
Finally, with the ISP connected, I installed the new bootloader using the Aduino IDE and can now upload sketched through the serial connection.
There seems to be one annoying issue left though. When the compiled sketch size is getting close to the limit of 7680 bytes the upload will fail with an error message. If anyone can shed some light on what I might have missed here, please leave me a comment.

